
DPS has a nice bunch of tips for getting the best of the spooky Halloween photos this year:
Halloween Photography Tips
Go forth and have a scary good time!
Tuesday, October 30, 2007
Friday, October 12, 2007
Day Trip
I took a little day trip out to a couple nature preserves to try out my polarizer filter. I went to the Lockport Prairie Nature Preserve and to Lake Katherine in Palos Heights. I had higher hopes for the day. Some of the prairie shots turned out so-so, but I didn't have very good luck at Lake Katherine.
First, the polarizer filter seemed to cause more trouble than good (though, to be fair, I wasn't shooting many sky shots at Lake Katherine). The exposure just came out all wrong on most of my LK shots. The colors were drab and there seemed to be a haze on any photo that didn't have sun lighting. Anything in the shade turned out awful and washed out. I was surprised, considering that these filters are supposed to saturate colors and provide better contrast. It seemed like it did the opposite in most cases.
/edit: I have a feeling part of my color problems lie in the fact that I switched my in-camera color space to Adobe RGB 1998. My last two shoots have felt very drab. I'm switching my in-camera setting back to sRGB and we'll see what happens...
Some of the prairie shots with sky in them turned out decent, but I'm not fully convinced that it was due to the polarizer.
I'm pretty bummed, as I was careful to read lots of reviews when I bought this filter a few months ago. I knew I couldn't afford a "pro" filter, but this one was not cheap, either. It's a $75 B+W 58mm circular glass polarizer.
I could probably use more practice rotating the filter for proper effects, but all in all it was a disappointing outing.
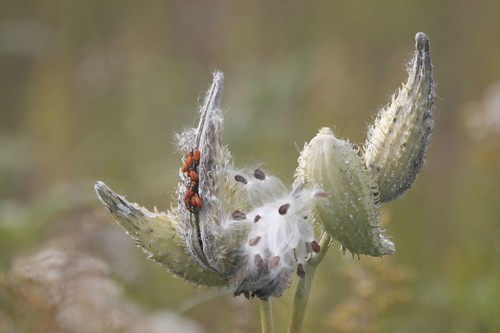
Here's one "keeper" shot that I took. I have no idea what it is (probably a weed!), but I like the bokeh effect.
Here's the entire set of photos - at least the ones worthy of uploading:
Lockport Prairie & Lake Katherine Day Trip
First, the polarizer filter seemed to cause more trouble than good (though, to be fair, I wasn't shooting many sky shots at Lake Katherine). The exposure just came out all wrong on most of my LK shots. The colors were drab and there seemed to be a haze on any photo that didn't have sun lighting. Anything in the shade turned out awful and washed out. I was surprised, considering that these filters are supposed to saturate colors and provide better contrast. It seemed like it did the opposite in most cases.
/edit: I have a feeling part of my color problems lie in the fact that I switched my in-camera color space to Adobe RGB 1998. My last two shoots have felt very drab. I'm switching my in-camera setting back to sRGB and we'll see what happens...
Some of the prairie shots with sky in them turned out decent, but I'm not fully convinced that it was due to the polarizer.
I'm pretty bummed, as I was careful to read lots of reviews when I bought this filter a few months ago. I knew I couldn't afford a "pro" filter, but this one was not cheap, either. It's a $75 B+W 58mm circular glass polarizer.
I could probably use more practice rotating the filter for proper effects, but all in all it was a disappointing outing.
Here's one "keeper" shot that I took. I have no idea what it is (probably a weed!), but I like the bokeh effect.
Here's the entire set of photos - at least the ones worthy of uploading:
Lockport Prairie & Lake Katherine Day Trip
Sunday, October 7, 2007
Before and After
Here's a before and after of one of the shots I took in Homewood yesterday. It's one of the shots on the fence re: inclusion in my portfolio, and my reasoning for including it is basically that I like what I did to it in post-production.... however, that's really not a valid reason to include it, since in theory nobody should know it didn't come out of the camera that way!!
I did a lot of cloning in Photoshop, and messed with the saturation and vibrance a bit in Lightroom, straightened the horizon, and cropped it a bit. I was pretty shocked that so much color even existed in the photo!! That bright sunlight sure does wash things out.
Before:
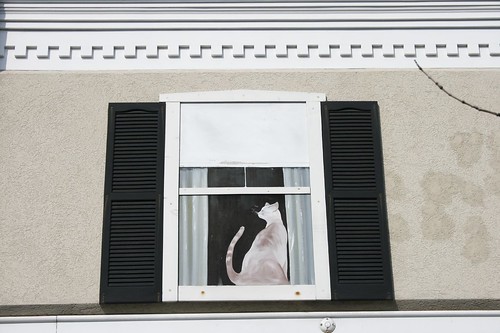
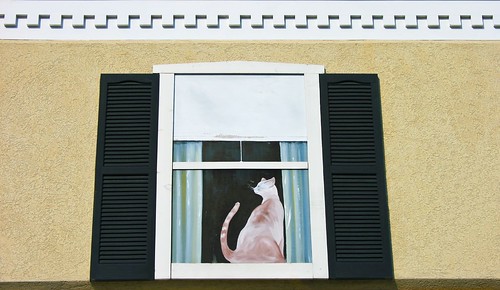
After:
I did a lot of cloning in Photoshop, and messed with the saturation and vibrance a bit in Lightroom, straightened the horizon, and cropped it a bit. I was pretty shocked that so much color even existed in the photo!! That bright sunlight sure does wash things out.
Before:
After:
Saturday, October 6, 2007
In-camera color settings
As I've been so interested in color management lately...
I was digging through my camera's menu this morning, checking to see how many shots I could shoot in RAW+Jpeg (not enough with a 2 gig memory card - gotta get me a 4 gig!), I saw that I was taking my photos in sRGB color mode.
A video I watched last night mentioned that sRGB is generally much too small of a color space for photographic work, and that Adobe 1998 is preferred. I've got Photoshop working in Adobe 1998, so I changed my camera to 1998. We'll see how today's shots came out.
In my photography class today, we shot around downtown Homewood, IL. I felt like a 5 year old, as I was drawn fairly exclusively to trains and fire trucks. :)
Friday, October 5, 2007
Fixing Blown Out Skies
I was browsing through the DPS forums this evening and came across a super useful video tutorial on how to fix a blown out sky.
How ironic - I've got a photo with a blown out sky right in front of me! I think I'll try it!
(That's what I was thinking when I came across the tutorial). :)
Anyhooo it involves using a selective color mask to fix the highlights in the sky, and then applying one of three techniques to enhance the sky: a gradient, rendered clouds, or a cloud brush.
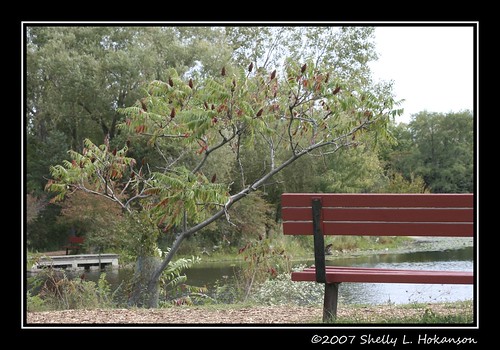
Here is one of my park bench shots from last weekend. (Yes, I realized after my post the other day that those park bench shots were a bit overexposed).
Before:
After:
How ironic - I've got a photo with a blown out sky right in front of me! I think I'll try it!
(That's what I was thinking when I came across the tutorial). :)
Anyhooo it involves using a selective color mask to fix the highlights in the sky, and then applying one of three techniques to enhance the sky: a gradient, rendered clouds, or a cloud brush.
Here is one of my park bench shots from last weekend. (Yes, I realized after my post the other day that those park bench shots were a bit overexposed).
Before:
After:
Monday, October 1, 2007
Color management and printing photos
Yesterday, when I went to print up some of the photos I took at the nature preserve, I was extremely disappointed that the colors in the prints did not come through the way they looked on my monitor.
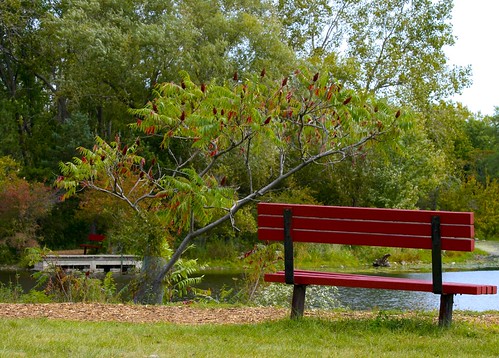
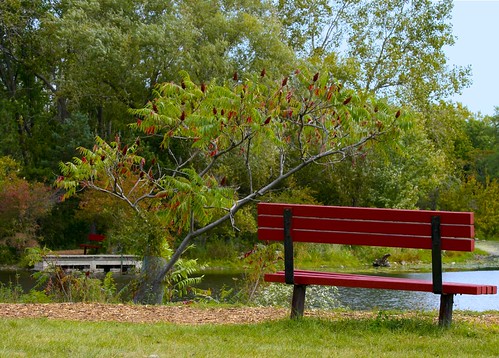
For example, I really liked this shot of the park bench because the red of the bench brought out the red in the tree. (What I couldn't decide is which angle I liked, as I also took one with the full bench in view, but for some reason I like the partial bench shot better).
When I printed it out, the bench looked almost brown, as did the red cone things in the tree - totally killing the effect. So I started Googling monitor calibration, figuring that my monitor wasn't showing me the "real" picture.
After reading through some mind-boggling articles on the topic, it turns out that my printer's color correction was at fault. I found an article on Canon Europe's professional network web site on "really simple color management." It was a moment of revelation.
The article explained that when you print from within Photoshop, you can set the print process to declare Photoshop as the controller of the color profile. Then, you configure Photoshop's color settings to your liking, and in the print dialog, set Photoshop to manage colors and choose your printer's color profile based on the type of media you are using (in my case, premium glossy photo paper, which Canon dubs PR1). Then, go into your printer's color management settings and disable color correction in the printer.
Voila!
My red bench now prints out red, and I'm happy as can be!
Additionally, I set my monitor to use the sRGB color profile. I don't have any monitor calibration tools, but for now, this worked well enough.
I'm using a Canon Pixma iP4200 printer, but these steps should work with any printer that allows you to manage your color settings.
Subscribe to:
Posts (Atom)


 Digg/phlyersphan
 Flickr/phlyersphan
 Myspace/phlyersphan
 YouTube/phlyersphan
 Last.fm/phlyersphan
 Del.icio.us/phlyersphan
 GMail/phlyersphan
 Technorati/phlyersphan


