
Oh, how I should have listened to the wise photographers who told me to invest in a good tripod and ballhead from the get-go!
I have a few pressing issues that affect my tripod/head purchase decisions right now:
1. Limited budget. I really can't spend a whole lot of money on a good, professional tripod and head at the moment. I'd like to stay under $100, if possible.
2. I currently have two tripods: one is a cheap retail store tripod and pan-head. It appears that I could remove the existing head and mount another if I wanted to. The other is a 20 year old Slik Universal U212 (at least, that's what the leg says) whose head appears useless to me. However, the tripod itself may be useful. (It was my dad's old tripod that I think he used with a video camera, many moons ago).
I'm thinking of just getting a decent entry level ballhead and using one of the two existing tripods. The cheap tripod is light enough to carry with me hiking in search of birds, but is a bit flimsy. The old tripod looks sturdy as all heck, but weighs a ton and wouldn't work well from a portability standpoint - at least not for hiking.
I'd love to go for a Bogen Manfrotto tripod and head setup, but those run closer to $200 even at the entry level. At the same time, I don't want to spend $100 on something I'll end up throwing in the closet and not using.
I need something that will support at least 6 lbs. My spotting scope weighs close to 4 lbs. My camera weighs a little over a pound, plus the adapter and T-mount. 6 lbs gives me plenty of wiggle room. My cheap Sunpak does support up to 6.6 lbs, so I may be able to use those legs with a new head.
I think a good compromise may be to get an entry level Bogen ballhead and use one of my existing tripods. Then, if the existing tripods don't work out, I can cough up the rest of the cash and get a Manfrotto tripod to go with the ballhead.
Does anybody have any tripod advice for a struggling birder/photographer who wants to do some digiscoping on a budget? :)
Thursday, December 27, 2007
Wednesday, December 26, 2007
The Digiscope Setup
Santa brought me a spotting scope and camera adapter for Christmas :) w00t!
There haven't been many birds out today to test it out, but I did get a few shots this morning. Here's a female house finch:

These small birds fill about half the frame with the magnification of the spotting scope, versus maybe 1/10th of the frame with my 300mm Canon lens. I think the shots are likely more crisp out of the 300mm lens, but with the extreme cropping required for close-ups, distortion occurs. It's nice to be able to preserve most of the detail of the shot even after cropping by using the digiscope setup.
I need to do some research on the best camera settings when using a scope. I'm currently using aperture priority mode, so that the camera chooses the correct shutter speed. The aperture shows as 00 on the camera, and of course it is manual focus as no lens is attached to the camera. Focusing is done via the scope.
The camera attaches to the scope via a camera adapter and a T-ring in place of the camera lens.
It's a little awkward trying to look downward into the camera viewfinder. I can see why people have said that it's easier to digiscope with a point-n-shoot camera, particularly one with the flip-out rotating LCD screen for those odd angles. I bought that adapter for the scope, too, and will try it with my Canon Powershot A70.
For working indoors (shooting through the window), I think the dSLR setup is OK. It's probably a bit clumsy in the field, but I'll have to try it. The point-n-shoot setup will likely be easier for field shooting.
The pictures I've taken so far have tended toward over-exposed. I'm shooting in RAW, so fixing that is simple in Adobe Lightroom, but I'd like to figure out how to get it right in-camera. Unfortunately, there are no test subjects in my tree right now, as landscapers are outside doing who-knows-what, scaring the birds away.
I'm very encouraged by the shots I've been able to get so far! It will take some practice to learn to maneuver the scope on the tripod (I also see now why all of the photography books I read encouraged spending money on a good ball-head tripod... my $35 3-way pan head is hideously clumsy and difficult to maneuver. It's fine for taking family portraits, but very difficult to use when trying to follow a bird moving around in a tree). A good tripod will likely be my next semi-major purchase.
There haven't been many birds out today to test it out, but I did get a few shots this morning. Here's a female house finch:
These small birds fill about half the frame with the magnification of the spotting scope, versus maybe 1/10th of the frame with my 300mm Canon lens. I think the shots are likely more crisp out of the 300mm lens, but with the extreme cropping required for close-ups, distortion occurs. It's nice to be able to preserve most of the detail of the shot even after cropping by using the digiscope setup.
I need to do some research on the best camera settings when using a scope. I'm currently using aperture priority mode, so that the camera chooses the correct shutter speed. The aperture shows as 00 on the camera, and of course it is manual focus as no lens is attached to the camera. Focusing is done via the scope.
The camera attaches to the scope via a camera adapter and a T-ring in place of the camera lens.
It's a little awkward trying to look downward into the camera viewfinder. I can see why people have said that it's easier to digiscope with a point-n-shoot camera, particularly one with the flip-out rotating LCD screen for those odd angles. I bought that adapter for the scope, too, and will try it with my Canon Powershot A70.
For working indoors (shooting through the window), I think the dSLR setup is OK. It's probably a bit clumsy in the field, but I'll have to try it. The point-n-shoot setup will likely be easier for field shooting.
The pictures I've taken so far have tended toward over-exposed. I'm shooting in RAW, so fixing that is simple in Adobe Lightroom, but I'd like to figure out how to get it right in-camera. Unfortunately, there are no test subjects in my tree right now, as landscapers are outside doing who-knows-what, scaring the birds away.
I'm very encouraged by the shots I've been able to get so far! It will take some practice to learn to maneuver the scope on the tripod (I also see now why all of the photography books I read encouraged spending money on a good ball-head tripod... my $35 3-way pan head is hideously clumsy and difficult to maneuver. It's fine for taking family portraits, but very difficult to use when trying to follow a bird moving around in a tree). A good tripod will likely be my next semi-major purchase.
Thursday, December 13, 2007
Birds in Motion
"Hey there, rabbit."
Anyone recognize that from the movie, "Before Sunrise?" One of my favorite movies of all time.

Found a bunny checking out my yard this morning, which was fun because there weren't a whole lotta birds out today - maybe because the snow and ice had been melting overnight. Today was warm too (I think it might have hit 40 degrees!) Maybe that's why the birds were hardly around this morning. Mr. Rabbit was in my yard when I got home from work tonight too - he seems to visit at night between 11p and midnight. I've seen him a few times. I threw some bread scraps out there for him, as well as the rest of a 2 day old apple that the starlings didn't finish up. Do rabbits like apples?
Got a photo that would have been cooler if a) I had a longer telephoto lens and b) I could have gotten the focus right.

This hawk was on the far bank of the pond in my back yard. This photo is cropped to insane proportions (thus my wish for a lens longer than 300mm) and is over-sharpened (thus my wish for having gotten the focus right). I had the camera on the tripod, aiming out my window at the hawk because my arms were too tired holding up the camera, and he was sitting on the shoreline for a LONG time - maybe half an hour! I really wanted to get a shot of him taking off to fly, so I sat patiently with the camera mounted on the tripod, holding the remote shutter cable. I got my shot, but I had a very shallow depth of field (another "learned my lesson for next time") and the hawk flew out of the plane of my preset focus.
Can't wait for the digiscope setup. :) I could have gotten a wicked close up of the hawk, I bet (though I don't think it would have helped with the flying shot. I hear that there's very little margin for movement when shooting photos through a spotting scope without getting awful blur). The anticipation of all that could be is killing me!!
Anyone recognize that from the movie, "Before Sunrise?" One of my favorite movies of all time.
Found a bunny checking out my yard this morning, which was fun because there weren't a whole lotta birds out today - maybe because the snow and ice had been melting overnight. Today was warm too (I think it might have hit 40 degrees!) Maybe that's why the birds were hardly around this morning. Mr. Rabbit was in my yard when I got home from work tonight too - he seems to visit at night between 11p and midnight. I've seen him a few times. I threw some bread scraps out there for him, as well as the rest of a 2 day old apple that the starlings didn't finish up. Do rabbits like apples?
Got a photo that would have been cooler if a) I had a longer telephoto lens and b) I could have gotten the focus right.
This hawk was on the far bank of the pond in my back yard. This photo is cropped to insane proportions (thus my wish for a lens longer than 300mm) and is over-sharpened (thus my wish for having gotten the focus right). I had the camera on the tripod, aiming out my window at the hawk because my arms were too tired holding up the camera, and he was sitting on the shoreline for a LONG time - maybe half an hour! I really wanted to get a shot of him taking off to fly, so I sat patiently with the camera mounted on the tripod, holding the remote shutter cable. I got my shot, but I had a very shallow depth of field (another "learned my lesson for next time") and the hawk flew out of the plane of my preset focus.
Can't wait for the digiscope setup. :) I could have gotten a wicked close up of the hawk, I bet (though I don't think it would have helped with the flying shot. I hear that there's very little margin for movement when shooting photos through a spotting scope without getting awful blur). The anticipation of all that could be is killing me!!
Thursday, December 6, 2007
Birds
I'm still waiting anxiously for Santa to bring my new spotting scope and dSLR adapter! :)
In the meantime, I've been getting some winter bird shots:
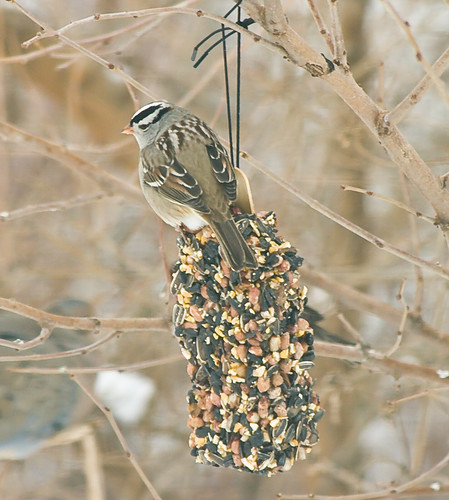
White crowned sparrow, I think?
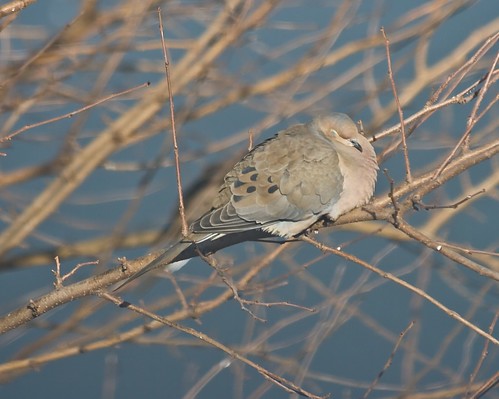
Napping Mourning Dove
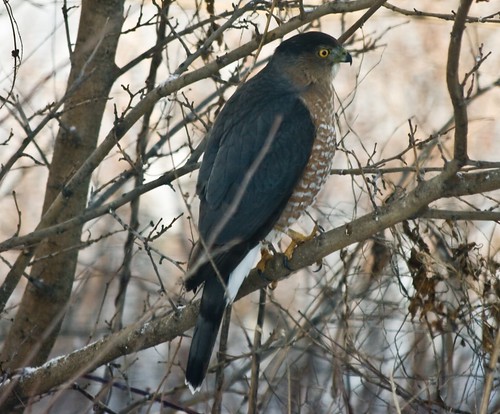
The hawk that refuses to be identified. Cooper's? Sharp shinned?
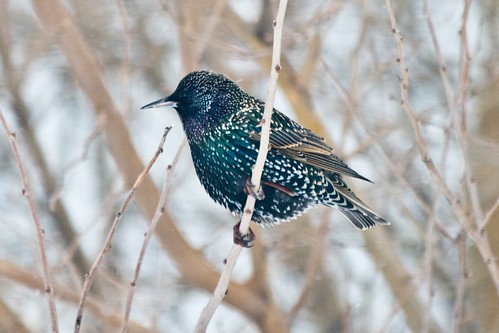
European Starling
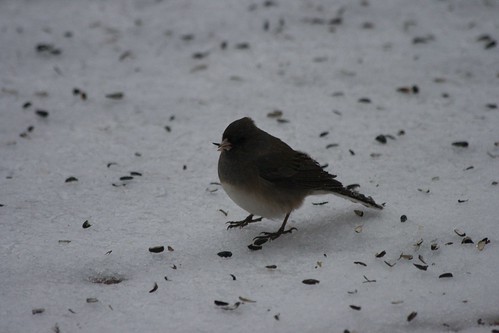
Slate colored dark eyed junco, during an ice storm
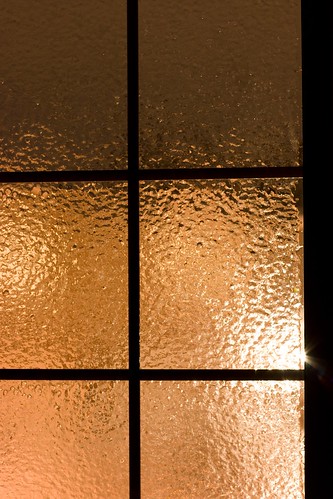
Speaking of the ice storm...
In the meantime, I've been getting some winter bird shots:
White crowned sparrow, I think?
Napping Mourning Dove
The hawk that refuses to be identified. Cooper's? Sharp shinned?
European Starling
Slate colored dark eyed junco, during an ice storm
Speaking of the ice storm...
Tuesday, November 27, 2007
Fun with Christmas Lights
Fun with Christmas Lights:
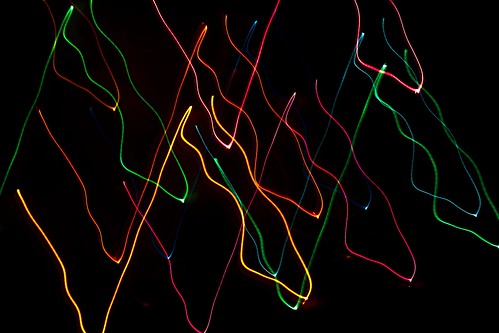
(click the photo to see more)
Shutter-priority mode
Exposure: 2 sec (2)
Aperture: f/13
Focal Length: 50 mm
ISO Speed: 100
Exposure Bias: 0 EV
Flash: Flash did not fire
(click the photo to see more)
Shutter-priority mode
Exposure: 2 sec (2)
Aperture: f/13
Focal Length: 50 mm
ISO Speed: 100
Exposure Bias: 0 EV
Flash: Flash did not fire
Sunday, November 25, 2007
I need a NaNoWriMo for photography
There are NaNoWriMo posts all over the blogosphere as the shoestring writers of the world work on their novels. (It's National Novel Writing Month). I need a NaNoWriMo for photography. I need some sort of challenge - a deadline. A goal.
I registered for the Intro to B/W Photography class at the college I teach at. (We can take courses for free, and I've decided to try and complete the photography certificate). It starts in January. I'm also taking meteorology. I'd like to do some weather photography. I suppose I'll have homework and deadlines soon enough! It's a film photography class with a darkroom component. I'm looking forward to really absorbing the truths of exposure.
I think I'm getting a digiscope and the SLR camera adapter for Christmas, which will give me new ways to get out and take pictures of birds. I hear that some owls hang out around here through the winter. I've never seen an owl in the wild, so that's one of my winter photography goals (to get a photo of an owl). I can't wait for the spring migration to see what kinds of birds I find!
Winter weather really zaps my motivation to get outside and shoot. :-/
Friday, November 16, 2007
Adobe Photoshop Lightroom 1.3 Update
Adobe has released an update for Photoshop Lightroom. The update brings Lightroom to version 1.3.
Included in the Lightroom 1.3 Update: Update OS X 10.5 (Leopard) support and additional camera support for the 1Ds Mark III, Nikon D3, Nikon D300, Olympus E-3 and more.
Lightroom 1.3 includes corrections for the following issues:
Lightroom 1.3 includes the following enhancements:
Included in the Lightroom 1.3 Update: Update OS X 10.5 (Leopard) support and additional camera support for the 1Ds Mark III, Nikon D3, Nikon D300, Olympus E-3 and more.
Lightroom 1.3 includes corrections for the following issues:
- Writing XMP metadata automatically has been corrected for performance issues
- Printing with the native resolution option enabled no longer sets the wrong dimension for portrait oriented images
- Prior to Camera Raw 4.3 there was the possibility that artifacts in edge transitions could be introduced through the Bayer demosaic and luminance noise reductions algorithms. This has been corrected.
- The Canon sRAW format and the Fuji compressed RAF formats are now supported.
Lightroom 1.3 includes the following enhancements:
- The import dialog now offers the option to render 1:1 previews as part of the import process
- The export dialog layout has been enhanced
- A Lightroom Preview Export SDK is available for developers to create and distribute Export Plug-ins. Further details are located on Adobe Labs
Sunday, November 11, 2007
I-355 Tollway, Opening Eve
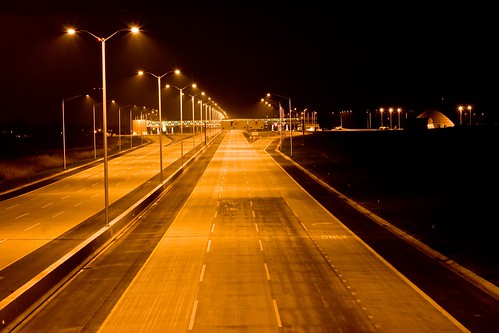
Well, the I-355 tollway south extension (dubbed "Veterans Memorial Tollway") opens sometime late tonight for tomorrow's rush hour traffic. I was able to drive the half mile down the road to the closest overpass and snap a few photos. There was a police vehicle here and there driving along the tollway, but I got a few shots with no cars in them. I figured, this is the first major tollway to open around here in 20 years, and how often do you get to see a tollway with NO cars on it?
I didn't spend much time messing around with camera settings, as I was certain cops were going to come arrest me at any moment, thinking I was a kid throwing shit off the bridge or something. (My tendency towards paranoia over getting in trouble for trespassing-like violations will likely not serve me well in photography and storm chasing - I will have to learn to get over it!)
I probably should have used a higher aperture setting. I had my tripod with me but the shoulder wasn't very wide and I was afraid to set it up, lest it get hit by a passing car. I sat the camera on the concrete ledge of the bridge to take these shots.
Other overpasses have more to look at in terms of signs and whatnot, but this one is closest to home, has the least light pollution, and is on the least busy street. (I'd have never gotten away with parking alongside any of the other overpasses, as those are too busy with traffic).
Behold, the I-355 Veterans Memorial Tollway, South Extension, as seen from the Bruce Road overpass:
(Click the photo to see the set)
Saturday, November 10, 2007
Reflections
I've been reading a lot about how the use of a polarizer filter can reduce reflections and glare, and I've seen some great examples of how this technique can improve photos.
There's another kind of reflection that can yield some pretty interesting effects.
This isn't a great photo by any means, but it reminded me of something I need to practice: really *see* what you're photographing.
I didn't notice the reflection until I got the photo off of my camera and onto the computer. Had I noticed it while framing the shot, I might have been able to do something cool with the effect. As is, cloud cover has moved in and the sky is no longer reflecting in the pond.
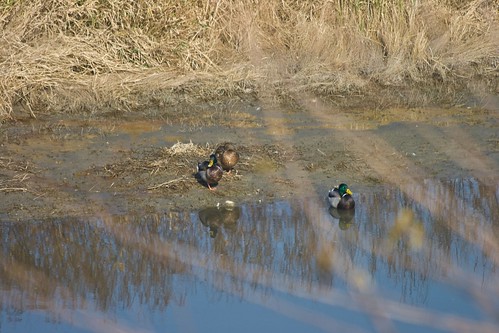
Friday, November 9, 2007
Comet Holmes
I was able to finally see Comet Holmes tonight through a mostly clear sky in Chicagoland. (Here's the full story on where this comet came from).
Since there is a lot of light pollution around here, bumping the ISO beyond 400 made for very noisy photos. (15 seconds was recommended, as stars move, and anything longer results in star trails/blur). ISO 800 allowed me to get a good exposure reading at 15 seconds, but the photos were very noisy. So I stuck with ISO 400. I think I was able to get away with 30 seconds - there are minor star trails but the comet itself seems OK. The second photo is a crop of the first.
I used manual focus and a remote shutter release to avoid camera shake.
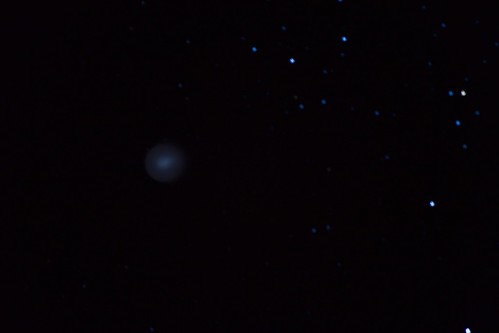
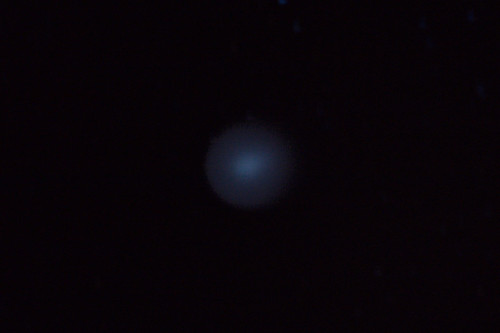
| Exposure: | 30 sec (30) |
| Aperture: | f/5.6 |
| Focal Length: | 300 mm |
| ISO Speed: | 400 |
| Exposure Bias: | 0/3 EV |
| Flash: | Flash did not fire |
Sunday, November 4, 2007
Digiscoping
Oh, how I love reading the posts and looking at the pictures on birdchick.com! Sharon does this thing called "digiscoping." It's like the next step for photographers who specialize in bird photography. Yeah, my 300mm telephoto is a nice lens, but I've been most happy with shooting "larger" wildlife with it, such as my trips to the zoo. It's tough to get close enough to a bird to get a sharp, frame-filling photo of just BIRD. I'd look at the pictures on birdchick.com and think, how on earth does she do it? What kind of camera does she use?
Well, it's not the camera, really. She attaches her camera to a spotting scope, a special kind of telescope. Digiscoping is the process of taking digital photos through a spotting scope.
To give an idea of the magnification, my camera lens zooms to 300mm. A spotting scope can achieve zooms up to 6,900mm. No wonder she can get so close up!
Sharon's digiscoping setup currently costs about $3,000. Oy. I'm sure it can be done more cheaply (as she says her equipment was top of the line when she bought it), though like cameras and lenses, it seems the advice on the street is buy the best one you can afford.
Someday! :)
It looks like a basic digiscoping setup can be had for under $500. I probably wouldn't know the difference! After googling around a bit...
A non-high-def digiscoping setup that would work with my camera, turning the digiscope into a telephoto lens: $370 + tax. This consists of:
- Zhumell 20-60x 80mm Spotting Scope (fogproof and waterproof) - $299
- Camera adapter for the 80mm Spotting Scope (to enable to scope to be used as a telephoto lens) - $49
- T-ring mount for Canon EOS cameras (to attach the camera adapter) - $17
Tuesday, October 30, 2007
Halloween Photo Tips
DPS has a nice bunch of tips for getting the best of the spooky Halloween photos this year:
Halloween Photography Tips
Go forth and have a scary good time!
Halloween Photography Tips
Go forth and have a scary good time!
Friday, October 12, 2007
Day Trip
I took a little day trip out to a couple nature preserves to try out my polarizer filter. I went to the Lockport Prairie Nature Preserve and to Lake Katherine in Palos Heights. I had higher hopes for the day. Some of the prairie shots turned out so-so, but I didn't have very good luck at Lake Katherine.
First, the polarizer filter seemed to cause more trouble than good (though, to be fair, I wasn't shooting many sky shots at Lake Katherine). The exposure just came out all wrong on most of my LK shots. The colors were drab and there seemed to be a haze on any photo that didn't have sun lighting. Anything in the shade turned out awful and washed out. I was surprised, considering that these filters are supposed to saturate colors and provide better contrast. It seemed like it did the opposite in most cases.
/edit: I have a feeling part of my color problems lie in the fact that I switched my in-camera color space to Adobe RGB 1998. My last two shoots have felt very drab. I'm switching my in-camera setting back to sRGB and we'll see what happens...
Some of the prairie shots with sky in them turned out decent, but I'm not fully convinced that it was due to the polarizer.
I'm pretty bummed, as I was careful to read lots of reviews when I bought this filter a few months ago. I knew I couldn't afford a "pro" filter, but this one was not cheap, either. It's a $75 B+W 58mm circular glass polarizer.
I could probably use more practice rotating the filter for proper effects, but all in all it was a disappointing outing.
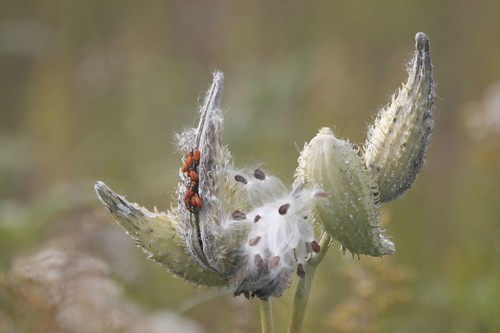
Here's one "keeper" shot that I took. I have no idea what it is (probably a weed!), but I like the bokeh effect.
Here's the entire set of photos - at least the ones worthy of uploading:
Lockport Prairie & Lake Katherine Day Trip
First, the polarizer filter seemed to cause more trouble than good (though, to be fair, I wasn't shooting many sky shots at Lake Katherine). The exposure just came out all wrong on most of my LK shots. The colors were drab and there seemed to be a haze on any photo that didn't have sun lighting. Anything in the shade turned out awful and washed out. I was surprised, considering that these filters are supposed to saturate colors and provide better contrast. It seemed like it did the opposite in most cases.
/edit: I have a feeling part of my color problems lie in the fact that I switched my in-camera color space to Adobe RGB 1998. My last two shoots have felt very drab. I'm switching my in-camera setting back to sRGB and we'll see what happens...
Some of the prairie shots with sky in them turned out decent, but I'm not fully convinced that it was due to the polarizer.
I'm pretty bummed, as I was careful to read lots of reviews when I bought this filter a few months ago. I knew I couldn't afford a "pro" filter, but this one was not cheap, either. It's a $75 B+W 58mm circular glass polarizer.
I could probably use more practice rotating the filter for proper effects, but all in all it was a disappointing outing.
Here's one "keeper" shot that I took. I have no idea what it is (probably a weed!), but I like the bokeh effect.
Here's the entire set of photos - at least the ones worthy of uploading:
Lockport Prairie & Lake Katherine Day Trip
Sunday, October 7, 2007
Before and After
Here's a before and after of one of the shots I took in Homewood yesterday. It's one of the shots on the fence re: inclusion in my portfolio, and my reasoning for including it is basically that I like what I did to it in post-production.... however, that's really not a valid reason to include it, since in theory nobody should know it didn't come out of the camera that way!!
I did a lot of cloning in Photoshop, and messed with the saturation and vibrance a bit in Lightroom, straightened the horizon, and cropped it a bit. I was pretty shocked that so much color even existed in the photo!! That bright sunlight sure does wash things out.
Before:
After:
I did a lot of cloning in Photoshop, and messed with the saturation and vibrance a bit in Lightroom, straightened the horizon, and cropped it a bit. I was pretty shocked that so much color even existed in the photo!! That bright sunlight sure does wash things out.
Before:
After:
Saturday, October 6, 2007
In-camera color settings
As I've been so interested in color management lately...
I was digging through my camera's menu this morning, checking to see how many shots I could shoot in RAW+Jpeg (not enough with a 2 gig memory card - gotta get me a 4 gig!), I saw that I was taking my photos in sRGB color mode.
A video I watched last night mentioned that sRGB is generally much too small of a color space for photographic work, and that Adobe 1998 is preferred. I've got Photoshop working in Adobe 1998, so I changed my camera to 1998. We'll see how today's shots came out.
In my photography class today, we shot around downtown Homewood, IL. I felt like a 5 year old, as I was drawn fairly exclusively to trains and fire trucks. :)
Friday, October 5, 2007
Fixing Blown Out Skies
I was browsing through the DPS forums this evening and came across a super useful video tutorial on how to fix a blown out sky.
How ironic - I've got a photo with a blown out sky right in front of me! I think I'll try it!
(That's what I was thinking when I came across the tutorial). :)
Anyhooo it involves using a selective color mask to fix the highlights in the sky, and then applying one of three techniques to enhance the sky: a gradient, rendered clouds, or a cloud brush.
Here is one of my park bench shots from last weekend. (Yes, I realized after my post the other day that those park bench shots were a bit overexposed).
Before:
After:
Monday, October 1, 2007
Color management and printing photos
Yesterday, when I went to print up some of the photos I took at the nature preserve, I was extremely disappointed that the colors in the prints did not come through the way they looked on my monitor.
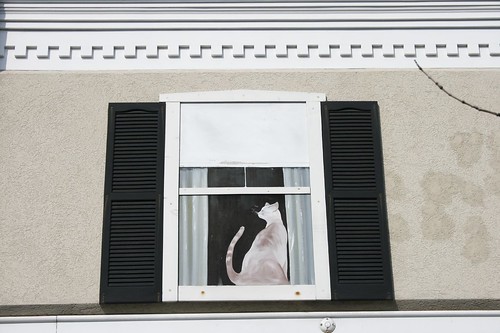
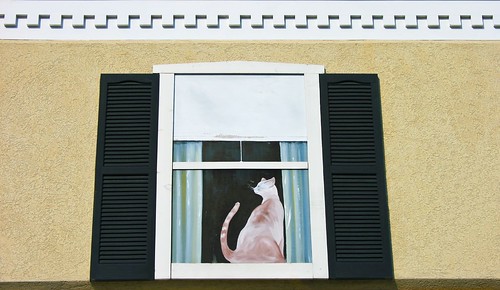
For example, I really liked this shot of the park bench because the red of the bench brought out the red in the tree. (What I couldn't decide is which angle I liked, as I also took one with the full bench in view, but for some reason I like the partial bench shot better).
When I printed it out, the bench looked almost brown, as did the red cone things in the tree - totally killing the effect. So I started Googling monitor calibration, figuring that my monitor wasn't showing me the "real" picture.
After reading through some mind-boggling articles on the topic, it turns out that my printer's color correction was at fault. I found an article on Canon Europe's professional network web site on "really simple color management." It was a moment of revelation.
The article explained that when you print from within Photoshop, you can set the print process to declare Photoshop as the controller of the color profile. Then, you configure Photoshop's color settings to your liking, and in the print dialog, set Photoshop to manage colors and choose your printer's color profile based on the type of media you are using (in my case, premium glossy photo paper, which Canon dubs PR1). Then, go into your printer's color management settings and disable color correction in the printer.
Voila!
My red bench now prints out red, and I'm happy as can be!
Additionally, I set my monitor to use the sRGB color profile. I don't have any monitor calibration tools, but for now, this worked well enough.
I'm using a Canon Pixma iP4200 printer, but these steps should work with any printer that allows you to manage your color settings.
Sunday, September 30, 2007
First Shot at a Panorama
I had a thought yesterday at the lake - why not try taking a series of shots and test out the photo merge feature in Photoshop CS3? I wasn't in a good location to take a panorama, but figured what the heck - at least it would give me something to try with.
I remembered from reading somewhere that the best way to do it is to get one snap and check the settings, and if everything looks OK, switch to manual mode, using those settings, so that auto modes don't mess up one of your shots (like, auto focus changing, or auto white balance changing, etc). So I did that and fired off 5 overlapping shots.
And let me tell you... I thought CS3 was worth the price of admission for the Quick Select tool, but now after using the Photomerge feature under File - Automate - holy cow. CS3 is a must have!! It's practically one-click. Srsly.
The bad news is, I have discovered a mosquito bite on the palm of my hand from my adventures. Booo.
If the image below is too small for your taste, click for a larger one.
Trip to Lake Katherine
I went to Lake Katherine in Palos Heights, IL yesterday for the first field shooting part of my photography class. It's a beautiful place. I'd like to get back there shortly when more leaves are changing color - maybe try a panoramic shot with Photoshop CS3's photo stitching abilities.
I got to experiment with shooting in shutter priority mode. I didn't have a tripod with me, but I did find an angle I could shoot a waterfall at that had a fence post that I could rest my camera on. There is definitely a difference in the silkiness of water movement, even between 1/4 second shutter speed and 1/25. (Not that I didn't believe all the photography books I've been reading - but it's a whole nother thing to see its effects with your own eyes). So I enjoyed toying around with that. I was looking for good animal shots and landscapes.
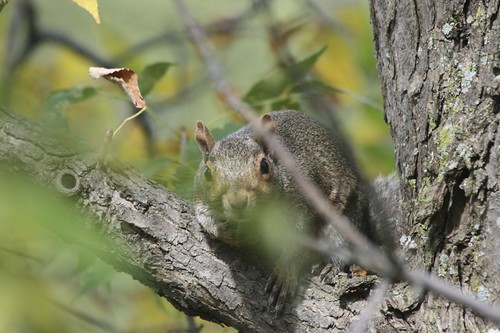
My "prized" animal shots are of an encounter I had with a squirrel. None are absolutely perfect, but they each gave me some things to think about next time I'm out shooting. I got one shot where the squirrel is trying to camouflage himself along the tree - but I got the tree in focus instead of the squirrel's eye. I knew it at the time but didn't want to move to change to manual focus point mode or manual focus, because I'm not quite familiar enough with that mode to change it without pulling the camera down from my eye - and I didn't want to miss the shot, so I took what I could.
I took about 250 shots and out of those, I've marked 34 "picks" from which I will try and choose my portfolio shots for class. I suppose how many I choose will depend how many picks I get out of next week's "urban" shoot. We need to choose 9 prints at 4x6 and one at 8x10 to turn in as our portfolio.
Here are the picks (click the picture below to view them on flickr):
I got to experiment with shooting in shutter priority mode. I didn't have a tripod with me, but I did find an angle I could shoot a waterfall at that had a fence post that I could rest my camera on. There is definitely a difference in the silkiness of water movement, even between 1/4 second shutter speed and 1/25. (Not that I didn't believe all the photography books I've been reading - but it's a whole nother thing to see its effects with your own eyes). So I enjoyed toying around with that. I was looking for good animal shots and landscapes.
My "prized" animal shots are of an encounter I had with a squirrel. None are absolutely perfect, but they each gave me some things to think about next time I'm out shooting. I got one shot where the squirrel is trying to camouflage himself along the tree - but I got the tree in focus instead of the squirrel's eye. I knew it at the time but didn't want to move to change to manual focus point mode or manual focus, because I'm not quite familiar enough with that mode to change it without pulling the camera down from my eye - and I didn't want to miss the shot, so I took what I could.
I took about 250 shots and out of those, I've marked 34 "picks" from which I will try and choose my portfolio shots for class. I suppose how many I choose will depend how many picks I get out of next week's "urban" shoot. We need to choose 9 prints at 4x6 and one at 8x10 to turn in as our portfolio.
Here are the picks (click the picture below to view them on flickr):
Friday, September 28, 2007
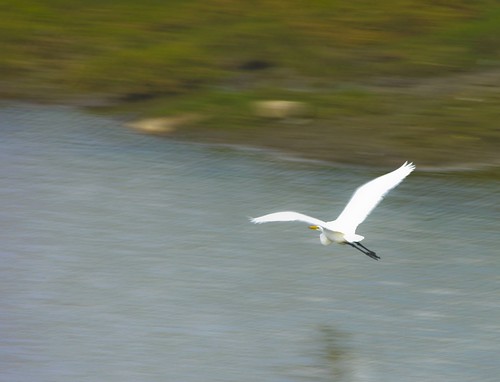
Egret in Flight: Take 2
I've got this photo up in the Critique forum over at DPS.
I've added some motion blur to the shore line in the background. I still can't put my finger on what I don't like about this picture. I like the egret, and his pose, and that I can see his head from the angle I shot at. Maybe it's the colors? So drab...
I do like it a bit better with more blur in the background. Here's what I've got so far:
Back Yard Adventures
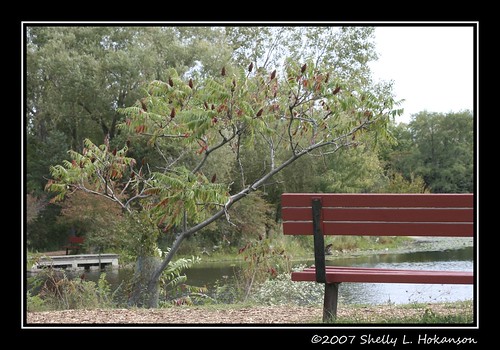
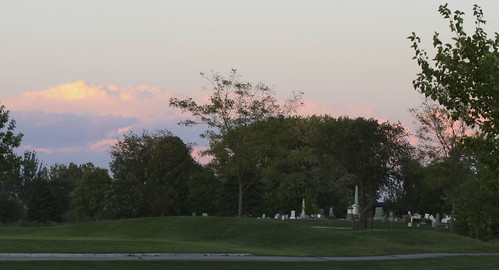
Hung out in my back yard around sunset this evening. This is my favorite time of year, weather-wise: 70-ish and just gorgeous. Fall leaves come down too quickly for my taste, and this year I hope to get out and get some photos as things change color. Unfortunately, it's been such a weird late summer/early fall that some trees are losing their leaves without them having changed colors. Kind of bizarre.
In this picture, I was trying to capture the sky, which looked a lot more dramatic in real life than I was able to portray with my camera. I tried various white balance settings, to no avail. I'm facing east, and the sun is setting to the west directly across from my subject. It made some neat colors in the clouds. This shot has been cropped quite a bit, and I cloned out an annoying golf hole flag.
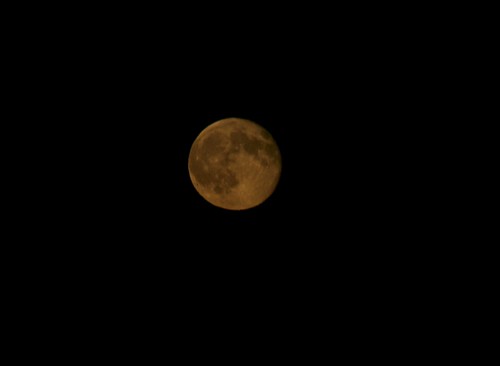
And a semi-low semi-red moon tonight - 98% full, waning gibbous. This wasn't the most crisp shot I got, but it showed the color of the moon the best. The red only lasted a few minutes, and after that it was just like any other moon...
Earlier in the afternoon, I caught a shot of a great egret flying over the pond in my back yard. Unfortunately, I had bumped my camera dial (apparently) and it was set to Manual mode (and the last thing I'd shot was the moon!) - so the shutter speed was way too slow. The photo was grossly over exposed, but I kicked down the exposure 4 stops in Lightroom and then messed with color levels a bit. This is what I got:
There's some camera shake around his wings, but it looks more like an indication of motion to me than a blur. I cropped the photo a bit, as there was originally more room on the right and I wanted to give the guy some room to fly into. I wish I had been outdoors when I took this shot - I was indoors behind a window. I kind of like it, particularly the position of the bird and the bit of shadow beneath him. I don't much like how the bank of the pond behind him looks.
Here's a question for the masses: are the effects of camera shake acceptable if they add to the movement of the subject in the photo?
(I can't say I'm sure that's the case here, but I think it's at least arguable!)
In this picture, I was trying to capture the sky, which looked a lot more dramatic in real life than I was able to portray with my camera. I tried various white balance settings, to no avail. I'm facing east, and the sun is setting to the west directly across from my subject. It made some neat colors in the clouds. This shot has been cropped quite a bit, and I cloned out an annoying golf hole flag.
And a semi-low semi-red moon tonight - 98% full, waning gibbous. This wasn't the most crisp shot I got, but it showed the color of the moon the best. The red only lasted a few minutes, and after that it was just like any other moon...
Earlier in the afternoon, I caught a shot of a great egret flying over the pond in my back yard. Unfortunately, I had bumped my camera dial (apparently) and it was set to Manual mode (and the last thing I'd shot was the moon!) - so the shutter speed was way too slow. The photo was grossly over exposed, but I kicked down the exposure 4 stops in Lightroom and then messed with color levels a bit. This is what I got:
There's some camera shake around his wings, but it looks more like an indication of motion to me than a blur. I cropped the photo a bit, as there was originally more room on the right and I wanted to give the guy some room to fly into. I wish I had been outdoors when I took this shot - I was indoors behind a window. I kind of like it, particularly the position of the bird and the bit of shadow beneath him. I don't much like how the bank of the pond behind him looks.
Here's a question for the masses: are the effects of camera shake acceptable if they add to the movement of the subject in the photo?
(I can't say I'm sure that's the case here, but I think it's at least arguable!)
Monday, September 24, 2007
Digg-ital Art

This is exactly why photography suits me so well; it's just creative enough, and just geeky enough, to make me happy.
See What the Duck
Saturday, September 22, 2007
Photography Class
I started my photography class today. It's a 4-week class called "Film/Digital Camera Skills." I'm excited that we'll get to take some field trips to do some shooting, but am a little disappointed that the content of the class is being delivered from a point-n-shoot/auto-mode perspective. I was hoping to get some practice with manual mode and exposure compensation and stuff like that.
Still, I'll get 8 hours worth of shooting time in the field, split between a nature preserve and an "urban" shoot (which is really set in the downtown portion of a suburban town).
I think the most valuable part of this class, to me, will be in having that dedicated time with my camera, and in reviewing the shots that I take and critiquing my work. I hope to pick up some inspiration, tips, and ideas along the way. It's a *very* beginner-level class, though, which is a bit disappointing.
For example, the instructor mentioned reciprocity, and then explained that it's a complex subject that is far beyond the scope of this class.
Sigh.
We've been told to shoot in the picture modes of our camera - portrait mode, landscape mode, sports mode, etc, and to shoot at ISO400.
Always the rebel... I'm going to shoot in Av, Tv, or manual modes, because that's what I need practice with, and I'm going to shoot at ISO100 unless circumstances dictate otherwise. We'll be shooting in bright daylight (9a-1p), so... rebel rebel!
At the end of the class, we are to turn in 10 prints: nine 4x6 prints and one 8x10 print as our "portfolio."
Most of the students in the class have point-n-shoot cameras. I saw 2 other people with Digital Rebels like mine. It looks like it'll be a very basic class, but I'm glad to at least get that 8 hours of field time to force me to get out and take pictures.
Our instructor is a Canon guy, so at least that bodes well for me if I have any specific questions about my camera!
Monday, September 10, 2007
Photoshop Frame Actions
Recently, I was looking for some information on how to add a decorative border to my photos. Nothing fancy - just a black border... someplace I could possibly put a copyright notice or a web URL.
As usual, the DPS community came to my aid when I posted the Add a Border? thread.
I found that there are lots of free actions out there available for Photoshop that can add a nice border to your photos. I found one that I like, and then recorded my own action to:
1. Run the frame action, then
2. Add a text layer with my name and copyright info
I found Jodi's Multiple Choices Gallery Frame Action at ATNCentral.com. Scroll down a bit from that link to find Jodi's action. I liked it the best, but there are many others you could try! :)
Sunday, September 9, 2007
Goose: Before and After
Let me tell ya... the people at the DPS forums are fantastic! Here's the entire thread on my critique and post-processing of a cat named Goose.
I posted that pic of Goose from the other day for critique on DPS. I knew it could be improved in post-processing, but had no clue what to do next. They gave me some tips, and - holy cow! Goose is one handsome devil :)
Goose - BEFORE:
Goose - AFTER:
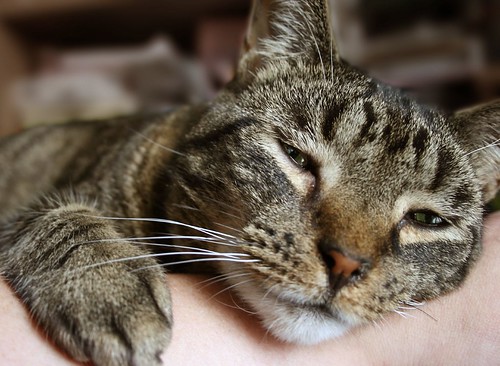
Much improved, no?? I think so!!
The greatest part is, I had no clue how to do the things they had suggested, so I had to look it all up... I learned a ton just from messing with this one picture of Goose!
Here's what I did:
First, I worked on the blur on the background. I never knew you could feather a selection - so I feathered it at 30px around the top of his head and body to prevent that unnatural line I was getting before. I did a lens blur, and pretty much maxed out all of the blur values. I also de-saturated that area and darkened it a bit.
Next, I learned how to use the quick mask tool to make a selection out of the inside of his eyes, and then I just increased the brightness there (which amazingly brought out the green in his eyes! I was shocked - I had no idea that could be done!)
Then, I upped the yellows and reds in the whole picture to warm up Goose's browns a bit. I was really unsure here - I'm not sure if there's some magic formula as to how much yellow/red one should have in a photo, but I went for as warm as I could without making it look fake. (Did I go too far?)
Finally, I used the unsharp mask on his facial area. I think I ended up with a radius of 2 and about 40%. Honestly I have no idea what exactly this tool does. I do know that when I went too far with it, his fur started to look like sticks :) So I went far enough to make his fur a bit more defined but stopped when it started looking weird.
Oh - and I cropped the left side down to his paw. I like the tighter crop, now that I see it :)
I posted that pic of Goose from the other day for critique on DPS. I knew it could be improved in post-processing, but had no clue what to do next. They gave me some tips, and - holy cow! Goose is one handsome devil :)
Goose - BEFORE:
Goose - AFTER:
Much improved, no?? I think so!!
The greatest part is, I had no clue how to do the things they had suggested, so I had to look it all up... I learned a ton just from messing with this one picture of Goose!
Here's what I did:
First, I worked on the blur on the background. I never knew you could feather a selection - so I feathered it at 30px around the top of his head and body to prevent that unnatural line I was getting before. I did a lens blur, and pretty much maxed out all of the blur values. I also de-saturated that area and darkened it a bit.
Next, I learned how to use the quick mask tool to make a selection out of the inside of his eyes, and then I just increased the brightness there (which amazingly brought out the green in his eyes! I was shocked - I had no idea that could be done!)
Then, I upped the yellows and reds in the whole picture to warm up Goose's browns a bit. I was really unsure here - I'm not sure if there's some magic formula as to how much yellow/red one should have in a photo, but I went for as warm as I could without making it look fake. (Did I go too far?)
Finally, I used the unsharp mask on his facial area. I think I ended up with a radius of 2 and about 40%. Honestly I have no idea what exactly this tool does. I do know that when I went too far with it, his fur started to look like sticks :) So I went far enough to make his fur a bit more defined but stopped when it started looking weird.
Oh - and I cropped the left side down to his paw. I like the tighter crop, now that I see it :)
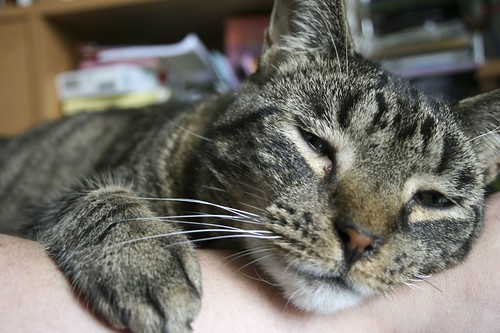
A cat named Goose
I posted this for critique at DPS: A cat named Goose
Yes, his name is Goose. I have a cat named Goose. (It makes more sense when I explain that the other two are named Merlin and Maverick).
Anyhooo I really like this shot of him, but I have a few critiques of my own and would love your feedback. (I know, you must all get tired of pet shots, and I can't even begin to compare with shots like Kitty Toes from KagoGrl - that shot was awesome!) But, I'm learning :)
First, I like that I got the focus on his eyes (or eye area, since his eyes are all sleepy-closed) so that his nose is a bit out of focus and the rest of his body is a bit out of focus.
I don't like the background. I wish the mess on my shelves was a bit more blurred. I tried to do a lens blur in Photoshop, but I really need to learn more about post-production, because I couldn't get the lens blur to look natural. It made a very fake looking line along the cat's head.
I wish Goose hadn't laid on his whiskers such that his right-hand whiskers were tucked under his face. I probably could try cloning his left whiskers and putting some on the right, but I think that's a bit beyond my PS skill level at this point!
I don't mind his ears being cut off. I don't think it hurts my ability to know what the photo is of, and I don't think that seeing his full ears would necessarily add anything.
What else could I do to improve this shot? It's straight from the camera, uncropped. I shot it without looking through the viewfinder, as that is MY arm he's laying on! (I do wish I had a nice tan or something, haha).
Thanks!
Friday, September 7, 2007
Composition: Uphill
I was out in the back yard goofing around with my camera today, and happened to catch a couple sets of golfers carrying their bags along the course. I was immediately inclined to take a picture, since most golfers around here opt for the golf carts.
I like the composition of both, but I wish I could have gotten golfer #1 into composition #2. I like the shot of the hills better in the second photo, but prefer the lone golfer. He also looks a bit more like he's working hard to hoof it up that hill, which was what I was going for in the "story" I was trying to tell.
I've posted the second photo to DPS for critique. It's the first photo I've posted there for critique, and I'm a little nervous as to what they'll say. There are some fantastically talented photographers over there, and I'm just little ol' me. I look forward to getting some suggestions, though (even if it makes me cry! LOL j/k)
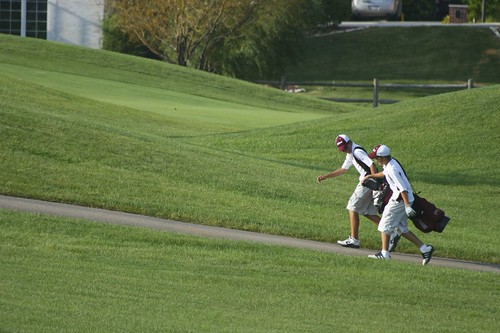
What is Bokeh?
What is bokeh?
I've seen the word "bohek" mentioned on the DPS forums a lot lately, but didn't really know what it meant until I came across an article posted by newbie (who doesn't seem to be a newbie at all!). The article is called "Bokeh Lesson from a Patient Bee" and I found it to be hugely helpful in explaining and demonstrating what good vs less than good bokeh looks like.
newbie goes on to give 4 detailed lessons on what makes good bokeh, including descriptions, examples of camera settings, and illustrative photos.
Very helpful! Thanks, newbie!
In photography, Bokeh is a Japanese word - the transliteration of a Japanese word for "blur" - describing the subjective aesthetic quality of out-of-focus areas of an image projected by a camera lens. For example, in some images the background may be deliberately caused to be out-of-focus to reduce distractions and to emphasize the primary subject.-- Wikipedia -Bokeh
I've seen the word "bohek" mentioned on the DPS forums a lot lately, but didn't really know what it meant until I came across an article posted by newbie (who doesn't seem to be a newbie at all!). The article is called "Bokeh Lesson from a Patient Bee" and I found it to be hugely helpful in explaining and demonstrating what good vs less than good bokeh looks like.
newbie goes on to give 4 detailed lessons on what makes good bokeh, including descriptions, examples of camera settings, and illustrative photos.
Very helpful! Thanks, newbie!
Friday, August 31, 2007
Howl at the Moon
Yep, more moon shots.
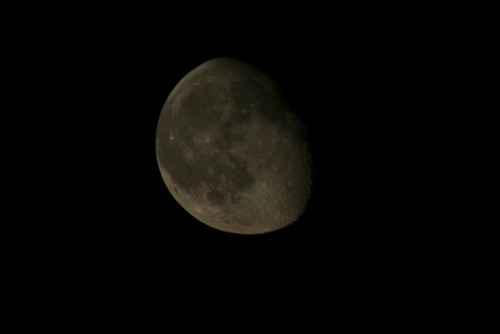
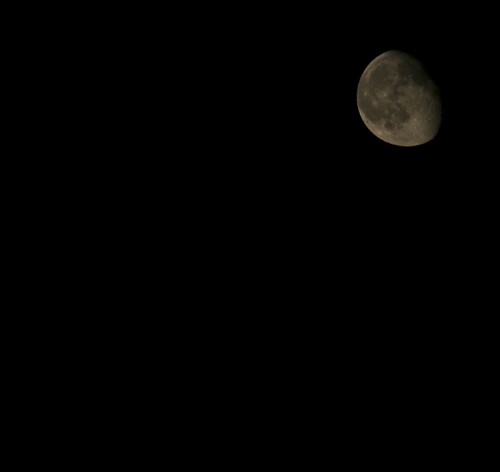
I was driving home tonight as saw the coolest red moon hanging low in the sky. I broke a few traffic laws to try and get home as fast as I could (hey, they're meant to be guidelines, right?), but couldn't get home fast enough to catch the wicked red shade. By the time I grabbed my camera and got outside, it was more yellowish than anything.
These shots were hand-held with my 70-300mm lens (which has image stabilization). To try and avoid the street lights, I drove down the road a bit and took these from a spot away from street lights. I was only a half mile or so from home, though, so there was still (sadly) plenty of skyline/ambient light. I thought it might help a bit with the noise to get away from the houses. It doesn't seem to have helped much.
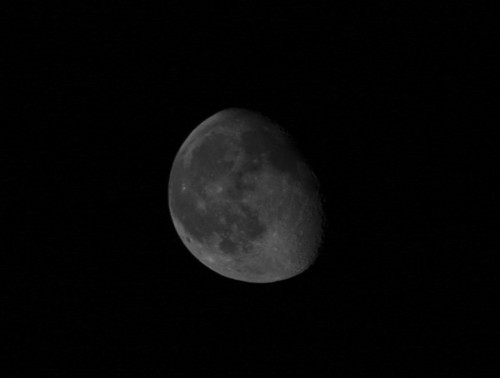
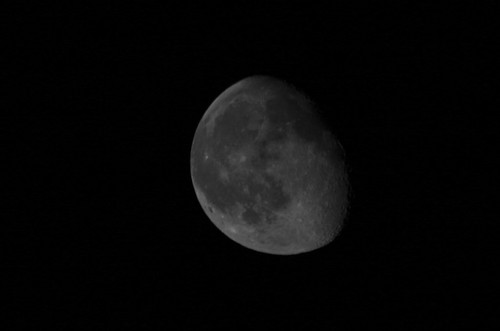
On the ones colored au naturale, I increased the blacks one notch in Lightroom to counteract the noise. On the others, I left them unprocessed (except for cropping) and switched to grayscale mode.
This moon is waning gibbous with 86% of the Moon's visible disk illuminated.
I was driving home tonight as saw the coolest red moon hanging low in the sky. I broke a few traffic laws to try and get home as fast as I could (hey, they're meant to be guidelines, right?), but couldn't get home fast enough to catch the wicked red shade. By the time I grabbed my camera and got outside, it was more yellowish than anything.
These shots were hand-held with my 70-300mm lens (which has image stabilization). To try and avoid the street lights, I drove down the road a bit and took these from a spot away from street lights. I was only a half mile or so from home, though, so there was still (sadly) plenty of skyline/ambient light. I thought it might help a bit with the noise to get away from the houses. It doesn't seem to have helped much.
On the ones colored au naturale, I increased the blacks one notch in Lightroom to counteract the noise. On the others, I left them unprocessed (except for cropping) and switched to grayscale mode.
This moon is waning gibbous with 86% of the Moon's visible disk illuminated.
Wednesday, August 29, 2007
Butterfly
Unexpected photo op - This morning, I was looking out my (home) office window for a bit, trying to motivate myself to get ready to leave for work. As I was organizing my pre-work agenda in my head (get dressed, stop at the bank, stop at the post office to mail the video card I just sold on ebay), I saw a big orange butterfly sitting on the yellow flowering bushes along the bank of the pond in my back yard.
I grabbed my camera and ran downstairs. He didn't stick around for long, but I was able to snag a couple shots:
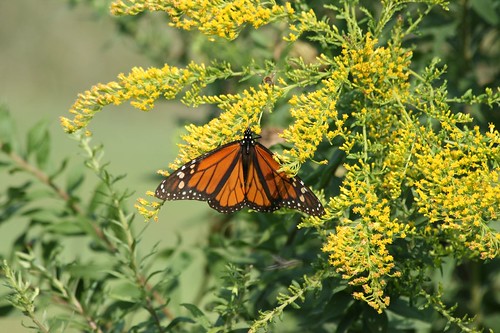
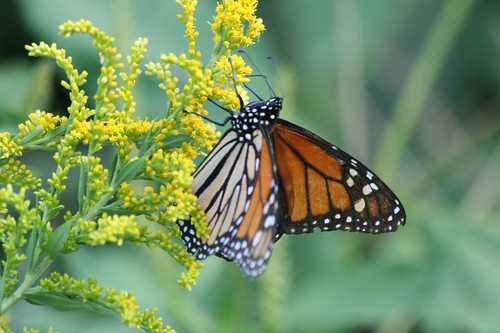
I grabbed my camera and ran downstairs. He didn't stick around for long, but I was able to snag a couple shots:
Tuesday, August 28, 2007
Lunar Eclipse Photos
Last night, when I went to bed, I had decided that I was too tired to try and wake up in the middle of the night to view and photograph the total lunar eclipse, which was scheduled to go total at 4:52am. I fell sound asleep, until my cat started puking on my bed at 4:25am. Coincidence? I figured, at that point, since I'd already gotten out of bed to clean up cat puke, I might as well take the tripod outside and photograph the eclipse....
Here are a few of the pictures I got. I think I figured out the source of the noise in my blacks. It has got to be the bright street lights that backlight me. There is one bright light 2 doors down from my driveway, and many others lining my street. The longer exposures were doing well to enhance the moon, but the noise in the blacks would get worse and worse. It's practically like shooting in daylight, the street lights are so close by and so bright. So, I'm figuring that is it. Unfortunately, unlike my first quarter moon shots, upping the black levels in the photos obscures part of the shadowed moon, so you'll just have to live with the noise and not zoom in too close :) I didn't crop most of these, for that reason.
My general settings were:
. Click any of them to see larger ones in Flickr, or view the set at Flickr.
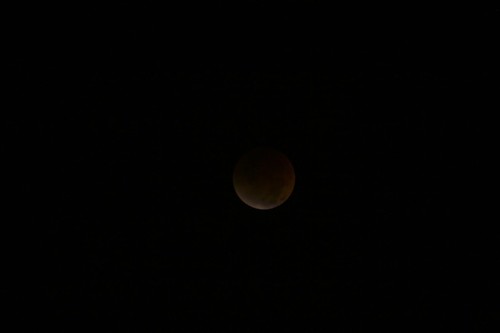
The first 4 photos are the partial eclipse, and the last 2 are after the total eclipse:
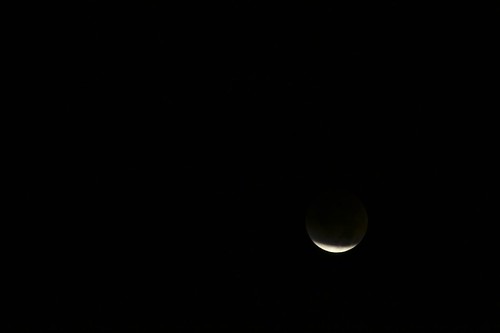
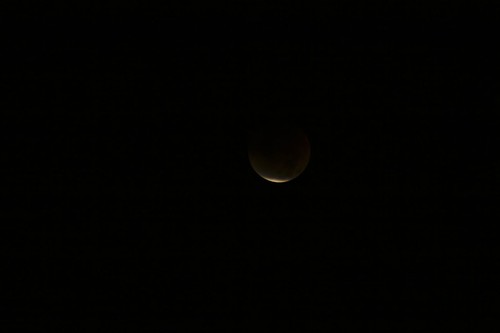
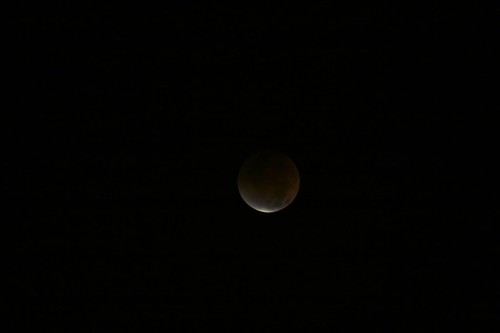
Exactly 4:52am, the start time of the total eclipse:
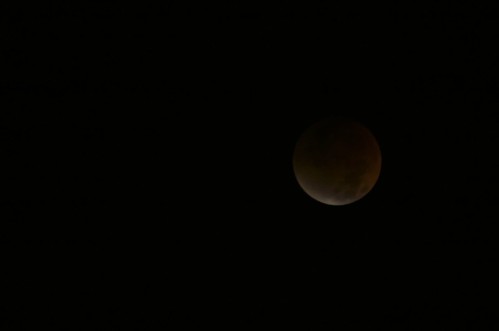
4:53am
Here are a few of the pictures I got. I think I figured out the source of the noise in my blacks. It has got to be the bright street lights that backlight me. There is one bright light 2 doors down from my driveway, and many others lining my street. The longer exposures were doing well to enhance the moon, but the noise in the blacks would get worse and worse. It's practically like shooting in daylight, the street lights are so close by and so bright. So, I'm figuring that is it. Unfortunately, unlike my first quarter moon shots, upping the black levels in the photos obscures part of the shadowed moon, so you'll just have to live with the noise and not zoom in too close :) I didn't crop most of these, for that reason.
My general settings were:
| Camera: | Canon EOS Digital Rebel XTi |
| Exposure: | 0.8 sec (4/5) |
| Aperture: | f/5.6 |
| Focal Length: | 300 mm |
| ISO Speed: | 200 |
| Exposure Bias: | 0/3 EV |
| Flash: | Flash did not fire |
The first 4 photos are the partial eclipse, and the last 2 are after the total eclipse:
Exactly 4:52am, the start time of the total eclipse:
4:53am
Monday, August 27, 2007
Lunar Eclipse Tonight
There's a lunar eclipse tonight. Where I live, the total eclipse will run from 4:52am to 6:23am. See the Sky and Telescope web site for details.
I've got a long day at work tomorrow, but I'm quite tempted to try and photograph this....
I've got a long day at work tomorrow, but I'm quite tempted to try and photograph this....
Upgrading the Canon Kit Lens
Here's some more food for thought on the topic of upgrading the Canon 18-55mm kit lens. CameraLabs.com has put together a nice video comparing 3 different Canon lenses, summarized nicely by DPS.
Saturday, August 25, 2007
Lightning
After a few attempts this summer, I finally caught a shot of some lightning. We had some wicked storms roll through Chicago this past Thursday, and after I got home from work I couldn't resist grabbing the camera and trying to capture some of the amazing light show.
I didn't have time to brush up on my "how to shoot lightning" research, so I was guessing at camera settings. I used manual mode, set the focus to infinity, and used f/8 aperture with a shutter speed of 2.5 seconds. I had my long lens on, the 70-300mm with image stabilization. I think in future attempts I might want to go with a wide angle lens (though I don't have one yet! LOL - the kit lens 18-55mm that came with the Rebel is the widest angle I've got).
I vaguely recalled reading of a guy who would just set the camera on bulb mode and leave the shutter open for a couple minutes, then close and repeat. I tried longer shutter speeds like that, but there was a lot of flash lightning mixed in with the bolts, so it wasn't really working.
I was doing all of this from the safety of my bedroom, shooting from my window. This particular shot that I got was actually hand-held. I was pretty much pressing the camera between my body and the window, with the lens resting on the window sill. Eventually, I ran down to get my tripod, but by then most of the good lightning had passed.
I used Adobe Lightroom to fix the exposure a bit (it was overexposed), blacken the blacks, and add the purple tint. My free trial finally ran out on Lightroom, but I've enjoyed using it so much that I purchased it, along with the Adobe Photoshop Lightroom Book for Digital Photographers by Scott Kelby .
.
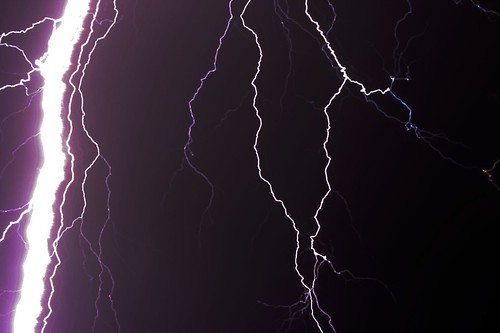
I didn't have time to brush up on my "how to shoot lightning" research, so I was guessing at camera settings. I used manual mode, set the focus to infinity, and used f/8 aperture with a shutter speed of 2.5 seconds. I had my long lens on, the 70-300mm with image stabilization. I think in future attempts I might want to go with a wide angle lens (though I don't have one yet! LOL - the kit lens 18-55mm that came with the Rebel is the widest angle I've got).
I vaguely recalled reading of a guy who would just set the camera on bulb mode and leave the shutter open for a couple minutes, then close and repeat. I tried longer shutter speeds like that, but there was a lot of flash lightning mixed in with the bolts, so it wasn't really working.
I was doing all of this from the safety of my bedroom, shooting from my window. This particular shot that I got was actually hand-held. I was pretty much pressing the camera between my body and the window, with the lens resting on the window sill. Eventually, I ran down to get my tripod, but by then most of the good lightning had passed.
I used Adobe Lightroom to fix the exposure a bit (it was overexposed), blacken the blacks, and add the purple tint. My free trial finally ran out on Lightroom, but I've enjoyed using it so much that I purchased it, along with the Adobe Photoshop Lightroom Book for Digital Photographers by Scott Kelby
| Camera: | Canon EOS Digital Rebel XTi |
| Exposure: | 2.5 sec (5/2) |
| Aperture: | f/8 |
| Focal Length: | 70 mm |
| ISO Speed: | 100 |
| Exposure Bias: | 0/3 EV |
| Flash: | Flash did not fire |
Thursday, August 9, 2007
Choosing my next lens
Now that I've had some time to get to know my Canon Digital Rebel XTi, I'm starting to discover what it is I actually want to do with this camera, and see some of the limitations in the equipment I own. The flexibility of changing lenses is what finally solidified my decision to go with a dSLR camera, and as such, I'm starting to get a feel for what lenses I want (now that I'm getting a sense of what I want to do with this thing!)
SLRGear has an article called, "Your Second Lens." I'm much enjoying it, as I'm at the point where I'm thinking about my next lens purchase. As I expected from reading various reviews, the kit lens(18-55mm) that comes with the Rebel is so-so. The zoom range is nice (I think the saying would be, it's a nice walk-about lens), but at f/3.5-5.6 aperture, my biggest complaint is that it pretty much sucks for hand-holding indoors in available light. One thing I am loving about this camera versus my old point-n-shoots is taking photos in available light without a flash. I love the ambiance and the mood. But the kit lens makes it tough, as the long shutter speeds result in a lot of blur, sans-tripod.
The frustration I've encountered while photographing indoors makes me think that maybe a faster lens with a wider aperture is in order.
I'm not made of money, so I'm going to have to make some sacrifices - most notably in the fact that I'll be looking at third party lenses as well as lenses made specifically for dSLR's (meaning, not full frame compatible lenses).
Canon makes a reasonably priced fast zoom lens that is full frame compatible - the EF 17-40mm f/4L (their higher end glass, I believe, as denoted by the L) - but it's not as "fast" as some of the other options out there in the same price range, and if my desire is to shoot in lower lighting situations without a flash, then I should be looking for the fastest bang for my buck, right?
That brings me to the Tamron 17-50mm f/2.8 Di II LD Aspherical IF SP AF. Around the same price point ($450) - fast, and gets a 9.07 rating from SLRGear. To quote their review:
While a long telephoto zoom of 500mm is darned attractive for my love of shooting animals, the 70-300mm I bought is serving me well and is going to have to do, as those longer zooms are upwards of $1,400! One can dream, though...
Unfortunately for me, I'm also into shooting flowers, so a macro lens is in order. After reading the various reviews, I think the Canon EF 100mm f/2.8 Macro USM is the winner. It's within $100 or so of the Tamron 90mm f/2.8 Di Macro 1:1 SP AF (the runner-up, in my mind) and has USM to boot. It's also full-frame compatible, should I ever be in a situation to upgrade my camera body.
All in all, I still haven't decided which lens I'll buy next, but at least I have chosen one in each category! :)
SLRGear has an article called, "Your Second Lens." I'm much enjoying it, as I'm at the point where I'm thinking about my next lens purchase. As I expected from reading various reviews, the kit lens(18-55mm) that comes with the Rebel is so-so. The zoom range is nice (I think the saying would be, it's a nice walk-about lens), but at f/3.5-5.6 aperture, my biggest complaint is that it pretty much sucks for hand-holding indoors in available light. One thing I am loving about this camera versus my old point-n-shoots is taking photos in available light without a flash. I love the ambiance and the mood. But the kit lens makes it tough, as the long shutter speeds result in a lot of blur, sans-tripod.
The frustration I've encountered while photographing indoors makes me think that maybe a faster lens with a wider aperture is in order.
I'm not made of money, so I'm going to have to make some sacrifices - most notably in the fact that I'll be looking at third party lenses as well as lenses made specifically for dSLR's (meaning, not full frame compatible lenses).
Canon makes a reasonably priced fast zoom lens that is full frame compatible - the EF 17-40mm f/4L (their higher end glass, I believe, as denoted by the L) - but it's not as "fast" as some of the other options out there in the same price range, and if my desire is to shoot in lower lighting situations without a flash, then I should be looking for the fastest bang for my buck, right?
That brings me to the Tamron 17-50mm f/2.8 Di II LD Aspherical IF SP AF. Around the same price point ($450) - fast, and gets a 9.07 rating from SLRGear. To quote their review:
As you might expect, it figuratively mops the floor with Canon and Nikon's "kit" lenses.I think this lens might be my next walk-about lens.
While a long telephoto zoom of 500mm is darned attractive for my love of shooting animals, the 70-300mm I bought is serving me well and is going to have to do, as those longer zooms are upwards of $1,400! One can dream, though...
Unfortunately for me, I'm also into shooting flowers, so a macro lens is in order. After reading the various reviews, I think the Canon EF 100mm f/2.8 Macro USM is the winner. It's within $100 or so of the Tamron 90mm f/2.8 Di Macro 1:1 SP AF (the runner-up, in my mind) and has USM to boot. It's also full-frame compatible, should I ever be in a situation to upgrade my camera body.
All in all, I still haven't decided which lens I'll buy next, but at least I have chosen one in each category! :)
Friday, August 3, 2007
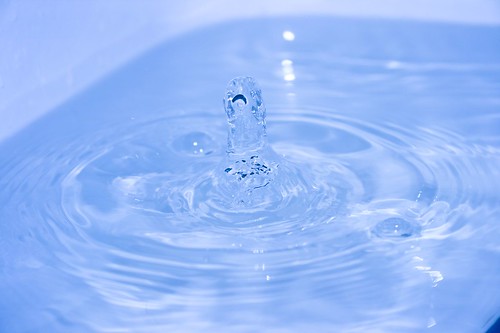
Fun with Water
The happy water drop photo inspired me to try to get a happy water drop of my own! I wasn't quite as successful, but learned a bit for next time I try :)
First off, I took a lot of shots without the flash, and I just couldn't see the drops. In frustration, I switched to the close-up auto mode, and the flash popped up. OK, might as well try it... and, voila. Water drops. So I went back to aperture priority mode (I was copying settings from the happy water drop photo) and took a few more shots. I got a couple so-so shots - better than I thought I'd get, but not as good as I'd hoped, if that makes any sense!
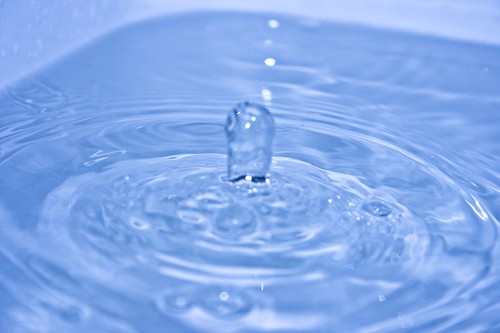
Next time, I will start out using the flash, and will try some different settings. From the few shots I'm keeping, it seems my biggest problem is with focus. It's hard to focus on something as elusive as a water drop! What I ended up doing was setting the auto focus to one specific point, then got it to lock in a focus once. Then I switched to manual focus to maintain that focus setting. Sometimes it worked, sometimes it didn't.
These were taken in my kitchen sink :)
Here are a couple of the shots I kept:
My favorite of them:
One that I think would have been better if I got the focus on the drop itself:
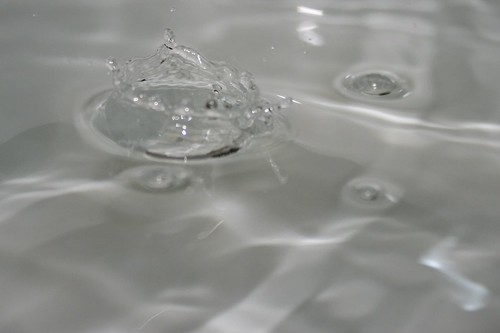
One that came out in close-up auto mode - it bumped up to ISO400 and is a bit too noisy to do anything with, but the splash is kinda cool:
First off, I took a lot of shots without the flash, and I just couldn't see the drops. In frustration, I switched to the close-up auto mode, and the flash popped up. OK, might as well try it... and, voila. Water drops. So I went back to aperture priority mode (I was copying settings from the happy water drop photo) and took a few more shots. I got a couple so-so shots - better than I thought I'd get, but not as good as I'd hoped, if that makes any sense!
Next time, I will start out using the flash, and will try some different settings. From the few shots I'm keeping, it seems my biggest problem is with focus. It's hard to focus on something as elusive as a water drop! What I ended up doing was setting the auto focus to one specific point, then got it to lock in a focus once. Then I switched to manual focus to maintain that focus setting. Sometimes it worked, sometimes it didn't.
These were taken in my kitchen sink :)
Here are a couple of the shots I kept:
My favorite of them:
One that I think would have been better if I got the focus on the drop itself:
One that came out in close-up auto mode - it bumped up to ISO400 and is a bit too noisy to do anything with, but the splash is kinda cool:
Happy Waterdrop
This photo has inspired me to go fill my sink and try for a happy waterdrop of my own!
I will, of course, let you know how it goes :)
I will, of course, let you know how it goes :)
Thursday, August 2, 2007

Monday, July 30, 2007
Help with this tugboat!
One thing I've been fruitlessly working on today is an attempt to edit one of the photos I took yesterday.
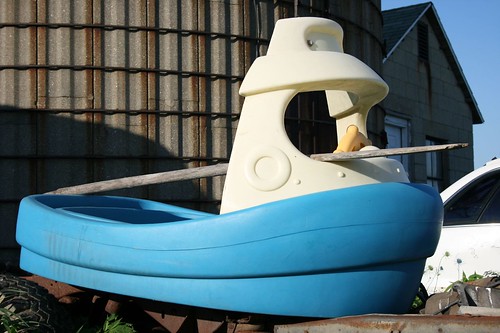
I'm trying to get rid of the white car in the background on the right side, preserving the old house.
It's not going so well. I can't seem to clone the house in any way that looks natural, and in trying to fix my cloning, I seem to have made a blurry mess out of the bottom right corner of the photo, killing the clean line of the front of the tugboat. Basically, I clone stamped the house along the bottom right side, then did some smudging to try and make the clone stamps less obvious. Healing didn't work - it ruined the lines of the siding of the housing, making it look even more blurry.
Another problem I think is that there's a bit of white reflection on the front of the tugboat from the white car, so when the car is removed, the reflection looks weird, but again, deleting those white pixels kills the smooth edge of the front of the boat.
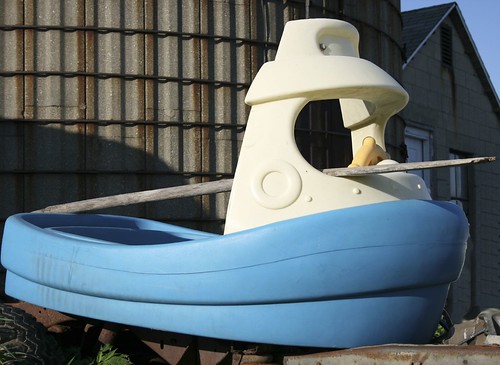
Any advice on how to fix this, or how to better go about starting from scratch?
I'm using Adobe Photoshop CS3, and also have the trial of Lightroom (for 15 more days!)
I'm trying to get rid of the white car in the background on the right side, preserving the old house.
It's not going so well. I can't seem to clone the house in any way that looks natural, and in trying to fix my cloning, I seem to have made a blurry mess out of the bottom right corner of the photo, killing the clean line of the front of the tugboat. Basically, I clone stamped the house along the bottom right side, then did some smudging to try and make the clone stamps less obvious. Healing didn't work - it ruined the lines of the siding of the housing, making it look even more blurry.
Another problem I think is that there's a bit of white reflection on the front of the tugboat from the white car, so when the car is removed, the reflection looks weird, but again, deleting those white pixels kills the smooth edge of the front of the boat.
Any advice on how to fix this, or how to better go about starting from scratch?
I'm using Adobe Photoshop CS3, and also have the trial of Lightroom (for 15 more days!)
Subscribe to:
Posts (Atom)


 Digg/phlyersphan
 Flickr/phlyersphan
 Myspace/phlyersphan
 YouTube/phlyersphan
 Last.fm/phlyersphan
 Del.icio.us/phlyersphan
 GMail/phlyersphan
 Technorati/phlyersphan


