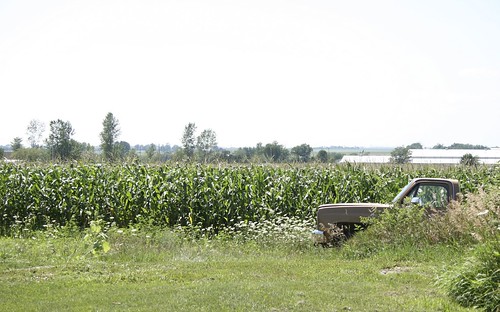
One thing I've been fruitlessly working on today is an attempt to edit one of the photos I took yesterday.
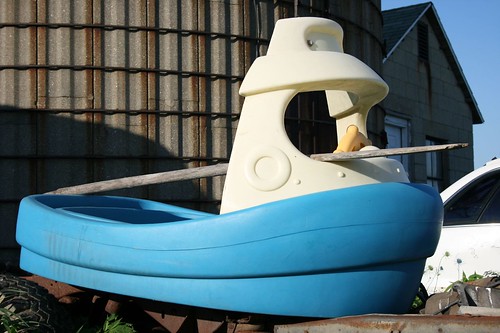
I'm trying to get rid of the white car in the background on the right side, preserving the old house.
It's not going so well. I can't seem to clone the house in any way that looks natural, and in trying to fix my cloning, I seem to have made a blurry mess out of the bottom right corner of the photo, killing the clean line of the front of the tugboat. Basically, I clone stamped the house along the bottom right side, then did some smudging to try and make the clone stamps less obvious. Healing didn't work - it ruined the lines of the siding of the housing, making it look even more blurry.
Another problem I think is that there's a bit of white reflection on the front of the tugboat from the white car, so when the car is removed, the reflection looks weird, but again, deleting those white pixels kills the smooth edge of the front of the boat.
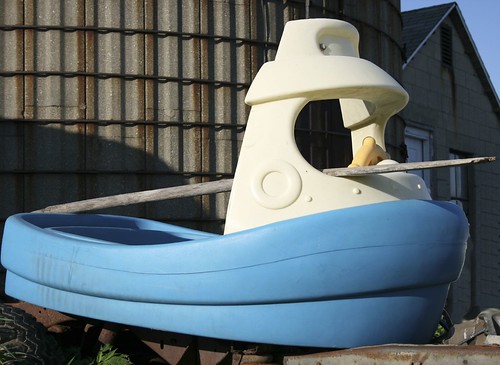
Any advice on how to fix this, or how to better go about starting from scratch?
I'm using Adobe Photoshop CS3, and also have the trial of Lightroom (for 15 more days!)
Monday, July 30, 2007
Assignment: Transport
DPS Assignment: Transport
Exposure: 0.006 sec (1/160)
Aperture: f/8
Focal Length: 55 mm
ISO Speed: 100
Exposure Bias: 0/3 EV
Flash: Flash did not fire
Exposure: 0.006 sec (1/160)
Aperture: f/8
Focal Length: 55 mm
ISO Speed: 100
Exposure Bias: 0/3 EV
Flash: Flash did not fire
Thursday, July 26, 2007
Alex Albrecht Likes Canon Over Nikon
I just finished listening to a podcast interview of Alex Albrecht (of Diggnation fame, one of my favorite podcasts ever), done by iStockphoto.com. At the end, they did a "choose one of the two" sort of thing.
When presented with choice, Nikon or Canon, Alex picked Canon. w00t!
They Accepted Me!
Dear Shelly (phlyersphan),
Welcome to iStockphoto.com, the designer's dirty little secret. Congratulations, the iStockphoto administrators have determined that your images are commercially and technically ready for iStockphoto.com."
Yay!
The application required 3 samples, none of which could come from their over-popular categories (like, flowers - which of course I have been taking a lot of pictures of!) I sent in my rubber duckie picture and butterfly, which were accepted right off the bat. I had trouble with the third photo.
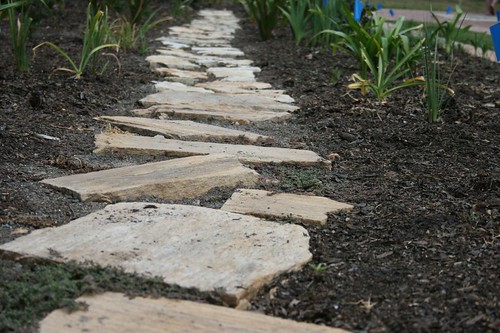
I had submitted a night shot of a tiki torch with a palm tree in the background, but I hadn't looked carefully enough at it. Since I was hand-shooting at night, I used ISO800, and there was a lot of pixel noise in the dark shades in the full size of the image. D'oh! It looked so cool in the smaller size :) So, I submitted a flower, and flowers aren't allowed. So finally, I looked at my shot of the rock path from the NC State University Arboretum, and realized that it needed some blue flags photoshopped out of the top right corner. It took me a while to get it right - I'm way new to post-production. I pulled it off, though, because they accepted that photo as my third sample, and I'm ready to rock!
Time to upload those pics to my collection there! I'm excited :)
I Want Moo Cards!!
I want Moo cards!
What a fantastic idea, particularly for photographers and graphic designers - and, cheap!
I can't wait until I have enough photos that I like to order some Moo cards :)
What a fantastic idea, particularly for photographers and graphic designers - and, cheap!
I can't wait until I have enough photos that I like to order some Moo cards :)
Monday, July 23, 2007
Photography Magazines
I've subscribed to a couple photography magazines: Shutterbug and Outdoor Photographer. Normally, I'd read a few issues from the news stand first, but I've discovered a glaring flaw in that practice: by the time I purchase a few issues at retail price, I've already spent as much as I would on a year long subscription. So, I just went ahead and subscribed. I've never read either of these magazines, but a friend reads the latter, and I like the web site of the former.
Are there any other good photography mags out there? Suggestions welcome :)
Sunday, July 22, 2007
The Moon - Take Two!
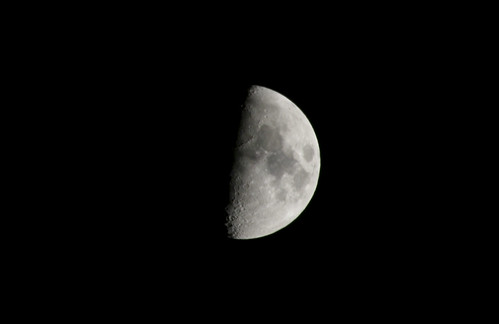
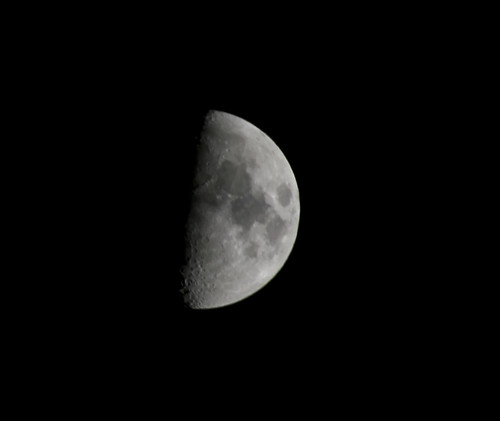
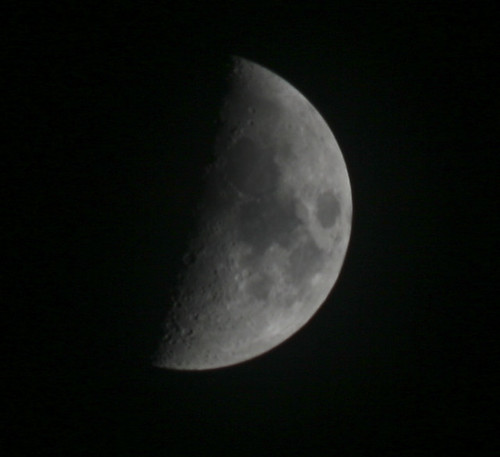
I shot the moon again tonight. Turns out, the best picture I got was using the settings from this moon photography article, but kicked up to ISO200 instead of 100. From the couple hundred shots I took, here's what I found:
Exposure: 0.067 sec (1/15)
Aperture: f/16
Focal Length: 300 mm
ISO Speed: 200
Exposure Bias: 0/3 EV
Flash: Flash did not fire
Exposure: 0.01 sec (1/100)
Aperture: f/8
Focal Length: 300 mm
ISO Speed: 200
Exposure Bias: 2 EV
Flash: Flash did not fire
Hoorah for the moon! I think I like the first one better. Its detail seems finer. Thoughts?
- Anything over ISO200 generates way too much noise, so much that the outline of the moon is affected and it becomes pretty much unfixable.
- Sunny f/16 doesn't catch enough light (f/16 and 1/00 or 1/125 shutter speed) - at least not at the first quarter moon. Maybe it would work for a full moon. Someday I'll try it.
- Manual mode is a necessity, at least with my lens. Shutter priority wanted an aperture of 5.6, and none of those shots turned out. Aperture priority was calculating 30 second shutter times - obviously way too long.
- Metering mode didn't seem to affect anything. I need to read up on this again.
- Auto exposure bracketing was helpful. Tonight, I set it to 2 stops either way.
- I removed the polarizer filter tonight and got much better shots than the other day.
Exposure: 0.067 sec (1/15)
Aperture: f/16
Focal Length: 300 mm
ISO Speed: 200
Exposure Bias: 0/3 EV
Flash: Flash did not fire
Exposure: 0.01 sec (1/100)
Aperture: f/8
Focal Length: 300 mm
ISO Speed: 200
Exposure Bias: 2 EV
Flash: Flash did not fire
Hoorah for the moon! I think I like the first one better. Its detail seems finer. Thoughts?
Find the Moon
If you'd like to try your hand at shooting the moon, here are some resources to help you plan your moonshot.
Photographer's Astronomy - Input your location, and this tool will show you where to find the moon in the sky, as well as the moonrise and moonset times (amongst other things).
US Navy Complete Sun and Moon Data for One Day - simple sun and moon rise and set times.
Moon Phase calculator - shows a calendar of the moon phases for every day of the month, so you can plan to get the phase of the moon that you're looking for.
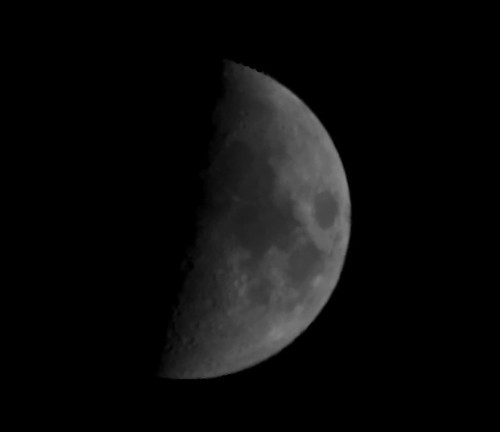
Crude attempt to fix the moon
Well, I've made a crude attempt to fix the moon. It's definitely not a keeper, but the practice is good for me. I need to pick up a book on post-production with Photoshop and Lightroom. I working with the trial of Lightroom right now, but I think I will end up buying it. I already have Photoshop, but it seems like overkill a lot of the time.
I converted the moon picture to grayscale, hoping that would get rid of the noise. It didn't, nor did noise reduction. So I filled the background with black. I lost a lot of detail in the moon in the process, and the outline looks a bit crude and unnatural. I'm sure there are better ways to fix this photo - I just haven't learned them yet!
I plan to take another shot at the moon ASAP, using a faster shutter speed.
Saturday, July 21, 2007
First Try at Moon Shots
I took my first shot at moon photos tonight. I checked out the Shooting the Moon thread on the DPS Forums, as well as this Lunar Photography Exposure Guide (scroll down a little for the chart).
The moon in my area tonight is a day off of the first quarter moon, so according to the chart, at ISO100 and f/16, the shutter speed should be about 1/15. (The moon is not full, thus the longer shutter speed, instead of the sunny f/16 rule, which would be 1/100 shutter speed).
I shot with a tripod and a shutter release cable, and a polarizing filter (can't remember which article I read that in - to prevent over-exposure). I also set auto exposure bracketing, so I was snapping 3 shots at a time. Manual focus.
All shots were taken at 300mm.
Of the shots I kept, most were either taken at f/16 and 1/15, or f/8 and 1/15 or 1/20.
When I cropped the shots, though, all of them had this greenish speckling in the black areas. What is that? From too much light? Should I have used a faster shutter speed?
Is there any way I can get rid of it in Photoshop to salvage any of these shots?
I'll definitely try again, but would appreciate any feedback from anyone who can tell from my shots what I've done wrong this time :)
Several more shots (including uncropped ones) are here.
Thanks!!!!
Exposure: 0.077 sec (1/13)
Aperture: f/8
Focal Length: 300 mm
ISO Speed: 100
Exposure Bias: 2/3 EV
Friday, July 20, 2007
Photography Composition Articles
If you don't want to sink a chunk of change into stacks of books on photography composition, check out this web site: http://photoinf.com/
It's full of articles on photography composition.
I, of course, opted to sink a chunk of change into a boatload of books (see My Bookshelf in the navigation column), but I'm sure I will read a bunch of these articles, too!
It's full of articles on photography composition.
I, of course, opted to sink a chunk of change into a boatload of books (see My Bookshelf in the navigation column), but I'm sure I will read a bunch of these articles, too!
iStockPhoto
I completed an application to contribute photos to iStockPhoto.com today. They claim to be "the world's fastest growing independent library" of royalty-free images. Their prices are cheap to buy stock photos, and you can contribute photos to sell as well.
The application requires you to input your contact info as well as a scan of a government-issued ID, then complete a quiz on their submission guidelines and submit 3 sample photos. The application review process can take a couple weeks to complete.
We'll see!
I found out about this web site through a book I read - The Digital Photography Book by Scott Kelby. I really enjoyed this book. It's a book built on the premise of real world shooting. It is based on what the author would tell you if you were out in the world on a photo shoot with him. It's an easy read, as it's light on theory and big on practicality, and the author has a sense of humor that I enjoyed. Good stuff. He mentioned iStockPhoto.com in his book, so I checked it out.
I'm not really in photography to make a career out of it or anything, but it sure would be exciting to say I sold a picture!
On an unrelated note, I had to attend a photo shoot at work yesterday for a piece that will be in the local newspaper. The photographer had a Canon camera (and what appeared to be a big honkin' professional long lens). I was too shy to ask for any details on his rig, but I sure was curious! "Hey, what's that lens you're using? What settings are you using? Any advice for a n00b?" Nope, I was a big chicken instead :) He hand-held the camera for all of the shots, which were basically composed of a group of people pretending to be in a computer class.
Thursday, July 19, 2007
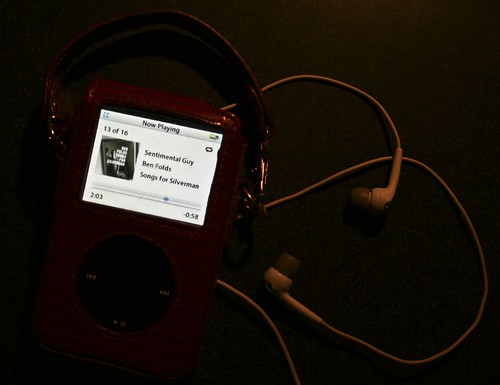
Assignment: Music
DPS Assignment: Music
Exposure: 0.067 sec (1/15)
Aperture: f/4
Focal Length: 27 mm
ISO Speed: 100
Exposure Bias: 0/3 EV
Flash: Flash did not fire
Shutter Priority Mode
I cropped the photo and healed out a few of the scratches on my ipod cover in Photoshop. Everything I tried re: tone in Lightroom made the image look too light to me (I wanted it to be dark, with the screen as the highlight and the rest of the ipod barely visible). So I just left the balance/brightness/etc as is. Suggestions welcome! I'm very new to photography, and though I know how to use PS for web design, I'm 100% new to photographic post-production! :)
Wednesday, July 18, 2007
Photography Causes Sleep Deprivation
Photography causes sleep deprivation - news at 11.
:) Actually, my love of thunderstorms and subsequent desire to capture the all elusive lightening bolt on film (thanks to my new hobby) causes sleep deprivation, at least when a t-storm rolls in late at night when I'm about ready for bed.
I tried to snap some lightening last night. No, I don't have a tripod yet (well, I didn't as of last night! I picked up a cheap one on sale at Best Buy today, until I get my dream tripod from B&H Photo), and no, the shutter release cable I ordered hasn't arrived yet, but that didn't stop me from trying! There wasn't much streaky cloud-to-ground lightning going on last night, though, and I don't think I caught any. I haven't pulled the images off the memory card yet, but I'm pretty sure I hit an oh-fer last night.
I did, however, find some good resources on photographing lightning, for the next time I try!
How to Take Lightning Photos by Matthew Cole - there were a lot of lightning photography how-to's out there, but for some reason I found this one the most helpful. Maybe because his explanation of the process and f/stop explanations made the most sense to me?
Lightning Probability Radar - a map from the National Weather Service (USA) showing the probability of lightning strikes over 3 hour time blocks. Go find a storm!
Current National Radar (USA) - found this link in Cole's article. I like it because it's simple, easy to read, and easy to zoom in on your area (just click the map).
I read a lot of other articles, but didn't bookmark any. Most sites were specific to how to photograph lightning with a film camera. I'd love to find some information specific to digital SLR's. If you know of any good sites for tips on how to photograph lightning, let me know!
Canon EOS Beginners' FAQ
Wow - there is a TON of useful information for us photo n00bs with Canon EOS cameras in this FAQ!
Canon EOS Beginners' FAQ by Photonotes.org
I was particularly interested to read the information on lens, as it provided a nice categorization of just about every Canon lens known to man. (Lens lists - scroll down a bit).
And finally, I know which Canon lenses are the "full frame" compatible lenses (the EF lenses, with the red dots). The "subframe" lenses are EF-S, with the white alignment dots. My uncle, who has been a professional photographer for probably just about as long as I've been alive (he'll kill me if he reads this for alluding to his age!), recommended that I invest in EF lenses rather than EF-S lenses, since the EF lenses will likely be compatible with full frame cameras of the future (which will become more ubiquitous as the full frame sensors become more affordable), whereas the EF-S lenses will not be compatible.
I'm glad to see that the 70-300 lens I bought is an EF lens! Whew! Lucky one there :)
Tuesday, July 17, 2007
What the Duck
My friend April enlightened me not only to photography, but to this hilarious comic strip:
See http://www.whattheduck.net/ for more photo geek humor :)
Ordered some new toys
Inspired by the great deals available on Amazon, I ended up ordering some new toys today:
Originally, I had planned on getting the Canon polarizer filter, but as I searched around, it was getting crappy reviews. So I set out in search of reviews of some of these other brands of filters. I ran across this filter review on CameraHobby.com:
Some googling of my own brought me to Wikipedia, which confirmed Schneider's production of today's B+W filters, as well as the fact that the filters are made using Schott glass, which is apparently well regarded in the photographic community. (I'm still learning this stuff!)
So, I went with the B+W. The CameraHobby.com article mentioned the multi coated (read: more expensive) filters being harder to clean and keep clean, so I decided to save a few bucks and go with the standard non-multi-coated version.
Why did I want a polarizer filter? Alot of my backyard bird and sunset shots are over water, as I have a pond in my back yard - thus the polarizer filter.
The UV filter is mainly just to protect my kit lens from scratches (I think I got it for $1.14 or something crazy!), and the remote switch is for the obvious.
I still need to get a tripod. The one on my B&H Wish List is near $200 (yikes!) but maybe I'll get that one from Santa this year. I am also hoping Santa will pick me up the Canon 500D close-up lens on my B&H Wish List too.
I'm thinking of putting my camera out in front of the bird feeders at near-ground level, with the remote switch, so I can sit a ways back from the camera. I'd like to get some snapshots of the ducks that come up from the pond to forage for seeds underneath the feeders. :)
- B+W 58mm Circular Polarizer Coated Glass Filter
- Canon UV-1 58mm Haze Filter
- Canon Remote Switch RS60 E3
Originally, I had planned on getting the Canon polarizer filter, but as I searched around, it was getting crappy reviews. So I set out in search of reviews of some of these other brands of filters. I ran across this filter review on CameraHobby.com:
Belated research into B+W revealed that it is actually Schneider of Germany, one of the finest lens makers in the world, that produce B+W filters.
Some googling of my own brought me to Wikipedia, which confirmed Schneider's production of today's B+W filters, as well as the fact that the filters are made using Schott glass, which is apparently well regarded in the photographic community. (I'm still learning this stuff!)
So, I went with the B+W. The CameraHobby.com article mentioned the multi coated (read: more expensive) filters being harder to clean and keep clean, so I decided to save a few bucks and go with the standard non-multi-coated version.
Why did I want a polarizer filter? Alot of my backyard bird and sunset shots are over water, as I have a pond in my back yard - thus the polarizer filter.
The UV filter is mainly just to protect my kit lens from scratches (I think I got it for $1.14 or something crazy!), and the remote switch is for the obvious.
I still need to get a tripod. The one on my B&H Wish List is near $200 (yikes!) but maybe I'll get that one from Santa this year. I am also hoping Santa will pick me up the Canon 500D close-up lens on my B&H Wish List too.
I'm thinking of putting my camera out in front of the bird feeders at near-ground level, with the remote switch, so I can sit a ways back from the camera. I'd like to get some snapshots of the ducks that come up from the pond to forage for seeds underneath the feeders. :)
Taking Pictures Through Windows
T3 offers up some tips on how to take great pictures through windows.
Sometimes, you just can't get an outside shot of your subject. With a little attention to detail, though, you can take great snapshots through windows (even through the windows of an airplane!). One tip not mentioned here - if possible, make sure the window is clean. Also, avoid shooting through window screens if possible.
My Summary:
1. Position your camera right against the window.
2. Shield any gaps between the lens barrel and the window with your hand (or wear a baseball cap or brimmed hat) to prevent reflections off the glass.
3. Turn off the flash.
4. Make sure you are focusing on your subject and not the window itself. Auto-focus often focuses on the closest object (in this case, the window). If that happens, use manual focus to focus on your subject, or set your focus manually to infinity.
Monday, July 16, 2007
Assignment: Life and Death
DPS Assignment: Life and Death
Confederate Cemetery at Oakwood, Raleigh, NC
Camera: Canon EOS Digital Rebel XTi
Exposure: 0.002 sec (1/640)
Aperture: f/5
Focal Length: 31 mm
ISO Speed: 100
Exposure Bias: 0/3 EV
Confederate Cemetery at Oakwood, Raleigh, NC
Camera: Canon EOS Digital Rebel XTi
Exposure: 0.002 sec (1/640)
Aperture: f/5
Focal Length: 31 mm
ISO Speed: 100
Exposure Bias: 0/3 EV
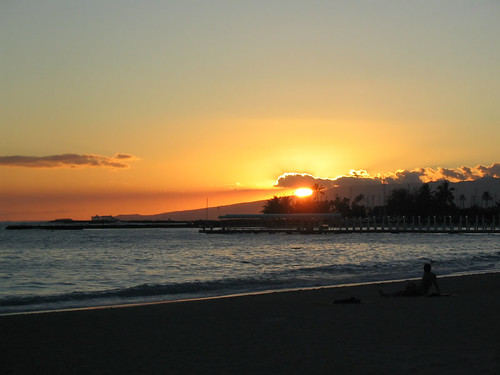
Assignment: Beach
DPS Assignment: Beach
Not sure this qualifies, as I took it 3 years ago with my Canon Powershot A70 point-n-shoot camera, before I knew a darn thing about photography! (Not that I know much now, with a whole 2 weeks under my belt!) :p
This was taken on Waikiki Beach in Maui, Hawaii. They have the most gorgeous sunsets there!
When I took the picture, I thought of editing out the guy sitting on the beach (since I don't know who he is), but I've since decided that I like him there :)
I have no camera settings to post, since this was probably taken on Auto mode with a point-n-shoot.
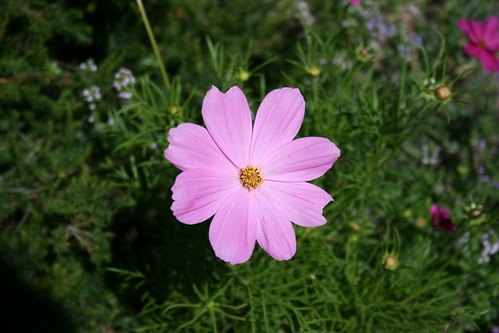
Assignment: Pink
DPS Assigment: Pink!
Took this in a friend's garden in Michigan, the first week I had my camera.
Camera: Canon EOS Digital Rebel XTi
Lens Type: Canon EF-S 18-55mm f/3.5-5.6
Exposure: 0.001 sec (1/800)
Aperture: f/5.6
Focal Length: 55 mm
ISO Speed: 100
Exposure Bias: 0/3 EV
Flash: Flash did not fire
Took this in a friend's garden in Michigan, the first week I had my camera.
Camera: Canon EOS Digital Rebel XTi
Lens Type: Canon EF-S 18-55mm f/3.5-5.6
Exposure: 0.001 sec (1/800)
Aperture: f/5.6
Focal Length: 55 mm
ISO Speed: 100
Exposure Bias: 0/3 EV
Flash: Flash did not fire
Assignment: Get Down and Dirty
DPS Assignment: Get Down and Dirty
Taken at the JC Raulston Arboretum at North Carolina State University in Raleigh. I was actually working on an assignment out of a book I'm reading to shoot rocks in their environment (though these rocks are in a bit of a man-placed environment!)
Camera: Canon EOS Digital Rebel XTi
Exposure: 0.003 sec (1/320)
Aperture: f/5.6
Focal Length: 55 mm
ISO Speed: 100
Exposure Bias: 0/3 EV
Flash: Flash did not fire
Assignment: Fill the Frame
DPS Assignment: Fill the Frame
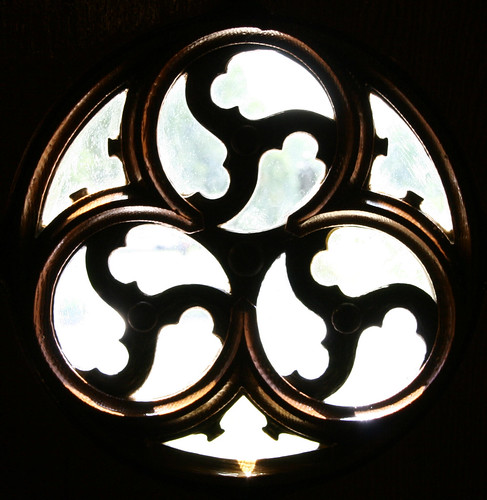
Taken last week - the window of a door at the Chapel at Duke University in North Carolina.
ISO 400, 55mm, f/9, 1/50 sec
Taken last week - the window of a door at the Chapel at Duke University in North Carolina.
ISO 400, 55mm, f/9, 1/50 sec
Sunday, July 15, 2007
Assignment: Backyard Birds
DPS Assignment: Backyard Birds
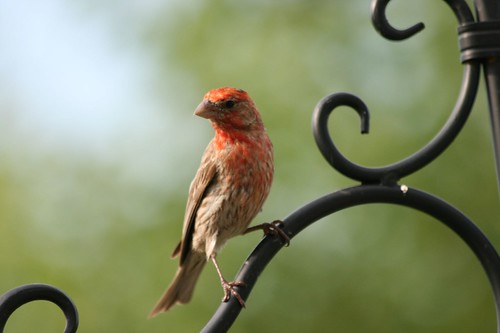
This is the reason I bought my camera two weeks ago and finally decided to get more serious about photography - to take pictures of the birds in my back yard!!
I've only been able to spend one afternoon out on my deck bird-watching, and that was the very first day I had my camera (I'd never used any sort of SLR camera before), but with that said, here are a couple of the shots I liked!
Male house finch:
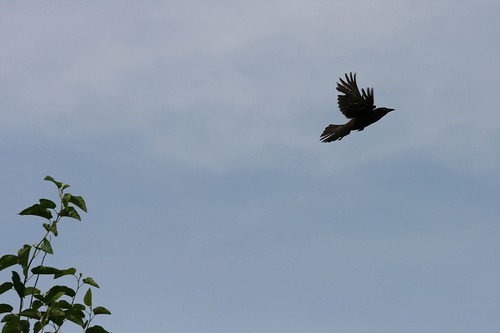
Grackle in flight:
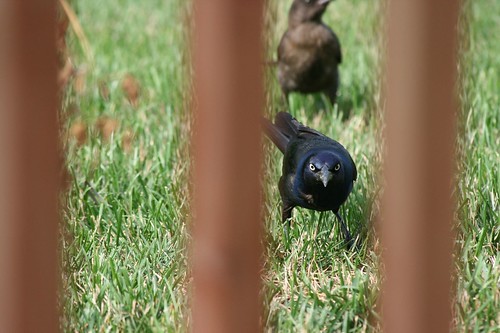
You lookin' at ME??? (Male grackle)
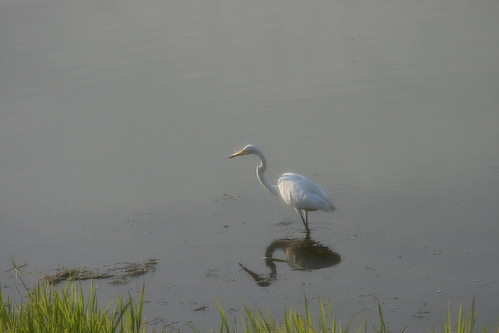
A mollern, maybe? Through my bedroom screen, unfortunately - but I wanted to catch the reflection while I had the chance!
Assignment: Pets
I found this web site called Digital Photography School. It's a discussion forum for people to discuss photography and post pictures and whatnot. They have "assignments" where you can share your shots and get feedback. Since I have some photographers here on my LJ as well, I'll post what I post there to here, too. Feedback welcome!
Assignment: Pets
http://digital-photography-school.com/forum/showthread.php?t=102
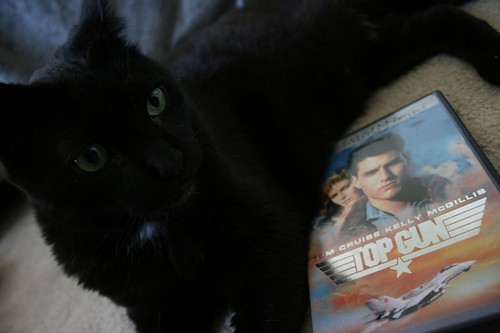
I have 3 cats. After reading the assignment and the "how to photograph pets" tutorial, I grabbed my camera and thought, "Who will be my first victim?" My black cat happened to be in the room with me, but I silently groaned, as he is so NOT photogenic. I don't think I have a single good picture of him, from the hundreds I've tried snapping over the years. He's skittish and doesn't do the typical "cat poses" that most cats lavish all over the cameras.
Nonetheless, I got down on the floor with him and figured I'd give it a go. He thought I was down there to pet him, of course, so I placated him for a while trying to get him to sit or lay down still. Then I noticed a DVD case on the floor next to him.
In order for this picture to make any sense, I must explain - my 3 cats are named Maverick, Goose, and Merlin. (This is Maverick). :)
I was in low-ish light so I used shutter priority mode at 1/20 (I was hoping to hand-hold the camera as I don't yet have a tripod). I didn't have much time, as Mav gets antsy sitting still, so I used auto-focus and tried as best I could to get the auto focus on his eyes. (I think it ended up more like on his forehead). I'm still trying to figure out how to manually set the focus points on my Canon Digital Rebel XTi. I know it can be done - I just haven't gotten around to figuring it out.
I lightened the exposure a couple notches in Lightroom (just downloaded the demo - considering buying it. I have Photoshop CS3, which I use for web development [my day job], but it seems like overkill for 90% of what I tend to want to adjust in my photos). Any advice on Lightroom? Worth the purchase?
Anyhow I'll stop babbling now and get to work on another assignment!
I'm a Photo n00b
My name is Shelly, and I'm a photo n00b (spelled with two zeros).
CNet describes me as a "Dabbler" -
That's pretty much dead-on accurate. I've been a point-n-shoot picture snapping enthusiast for years. My father, who passed away 7 years ago, was a photography enthusiast as well. Photography is one of those things I've been meaning to get around to getting more serious about for years.
The time has come.
A few weeks ago, I purchased the Canon Digital Rebel XTi and its EF-S 18-55mm kit lens, along with a telephoto lens, the Canon EF 70-300mm f/4-5.6 IS USM.
Ever since, I've been devouring photography books on camera settings, techniques, composition, and just about anything else photography-related that I can get my hands on.
My main interest is nature photography, though I expect to also shoot family gatherings and parties and the like. Since I blog a lot anyway, I thought it might be fun to be able to look back at my journey through all this stuff once I figure out what I'm doing :)
So, welcome to my journey from photo n00b to photographer... if I'm lucky!
CNet describes me as a "Dabbler" -
I'm exploring photography as a fun hobby but getting serious enough for an SLR and a few lenses. I devote some of my time specifically to photography when I travel. I sometimes have my nephews and nieces pose for me at family gatherings, and I have several hundred pictures of the family cat. I'm thinking about taking a weekend photo seminar. I might make a 16x20-inch print of a great shot and frame it.
That's pretty much dead-on accurate. I've been a point-n-shoot picture snapping enthusiast for years. My father, who passed away 7 years ago, was a photography enthusiast as well. Photography is one of those things I've been meaning to get around to getting more serious about for years.
The time has come.
A few weeks ago, I purchased the Canon Digital Rebel XTi and its EF-S 18-55mm kit lens, along with a telephoto lens, the Canon EF 70-300mm f/4-5.6 IS USM.
Ever since, I've been devouring photography books on camera settings, techniques, composition, and just about anything else photography-related that I can get my hands on.
My main interest is nature photography, though I expect to also shoot family gatherings and parties and the like. Since I blog a lot anyway, I thought it might be fun to be able to look back at my journey through all this stuff once I figure out what I'm doing :)
So, welcome to my journey from photo n00b to photographer... if I'm lucky!
Subscribe to:
Posts (Atom)